Showing posts with label Blogging with Friends. Show all posts

April 8, 2019

Blogging with Friends Spring Cleaning Edition April 2019


The Unpaper Towel - Reusable Kitchen Towels

Hey!!!! I'm back with a tutorial!!!! WOOOO HOOOO!!! It has a been a while!! About 3 1/2 years!! My goodness!!! I am so sorry. But life.... OH, BOY!!!!! 

Anyway, this one is quick, easy, and so much fun!!!! 

What you'll need

1/2 each of 3 different flannel fabric designs (or 1 1/2 yards if you want to keep it all the same)

1 1/2 yards of terry cloth

2 packs of sew on velcro strips (the long kind)

This will make 15 reusable kitchen towels.


STEP 1

As always iron out your wrinkles... I'm pretty sure I waited and did that around step 3 or 4 this time.... Shhhh....

STEP 2

Measure and cut


I cut them about 11.5 by 7.5.


STEP 3

Cut the velcro strips into 1 1/4" pieces. 


You're going to need 30 of them. 
I put sides together before I cut so they'd be exactly the same cut. 


STEP 4

Sew the fuzzy, soft side of the velcro to the top and bottom corner of one side of the terry cloth, about 5/8" from the edge.


STEP 5

Sew the scratchy side of the velcro to the right side of the flannel, top and bottom corners, 5/8" from the edge. 


STEP 6

Wrong sides together, zigzag stitch along the outside edges. 

Repeat until you have 15 unpaper towels!!!!!


Then you just attach the velcro and roll them up. You can stand them on your counter or put them on your paper towel holder. 

I hope you enjoyed my little tutorial!!!!

Now hop on over and check out all the wonderful things the other ladies have for you this month!!!!


October 21, 2014

Blogging with Friends - DIY Anna Cape (Frozen)

Welcome to another edition of Blog with Friends! 
We have some GREAT stuff for you this month! Tons of Halloween goodness! 


For my part, I am going to show you how to make a super easy, super warm Anna cape. You still have plenty of time to whip this up. (It would also make a great present.)


WHAT I USED 

About 5 yards of fleece 
4 yards of trim
1 frog enclosure
Small piece of black fleece


STEP 1


I used my go to pattern piece (made from one of Cailey's shirts) to cut the back of the cape. 

I just sort of free handed the shape towards the bottom.  It goes out and the bottom has a slight curve to it. 

I added 27" to the pattern for the length. 

Cut 1 on the fold.


STEP 2


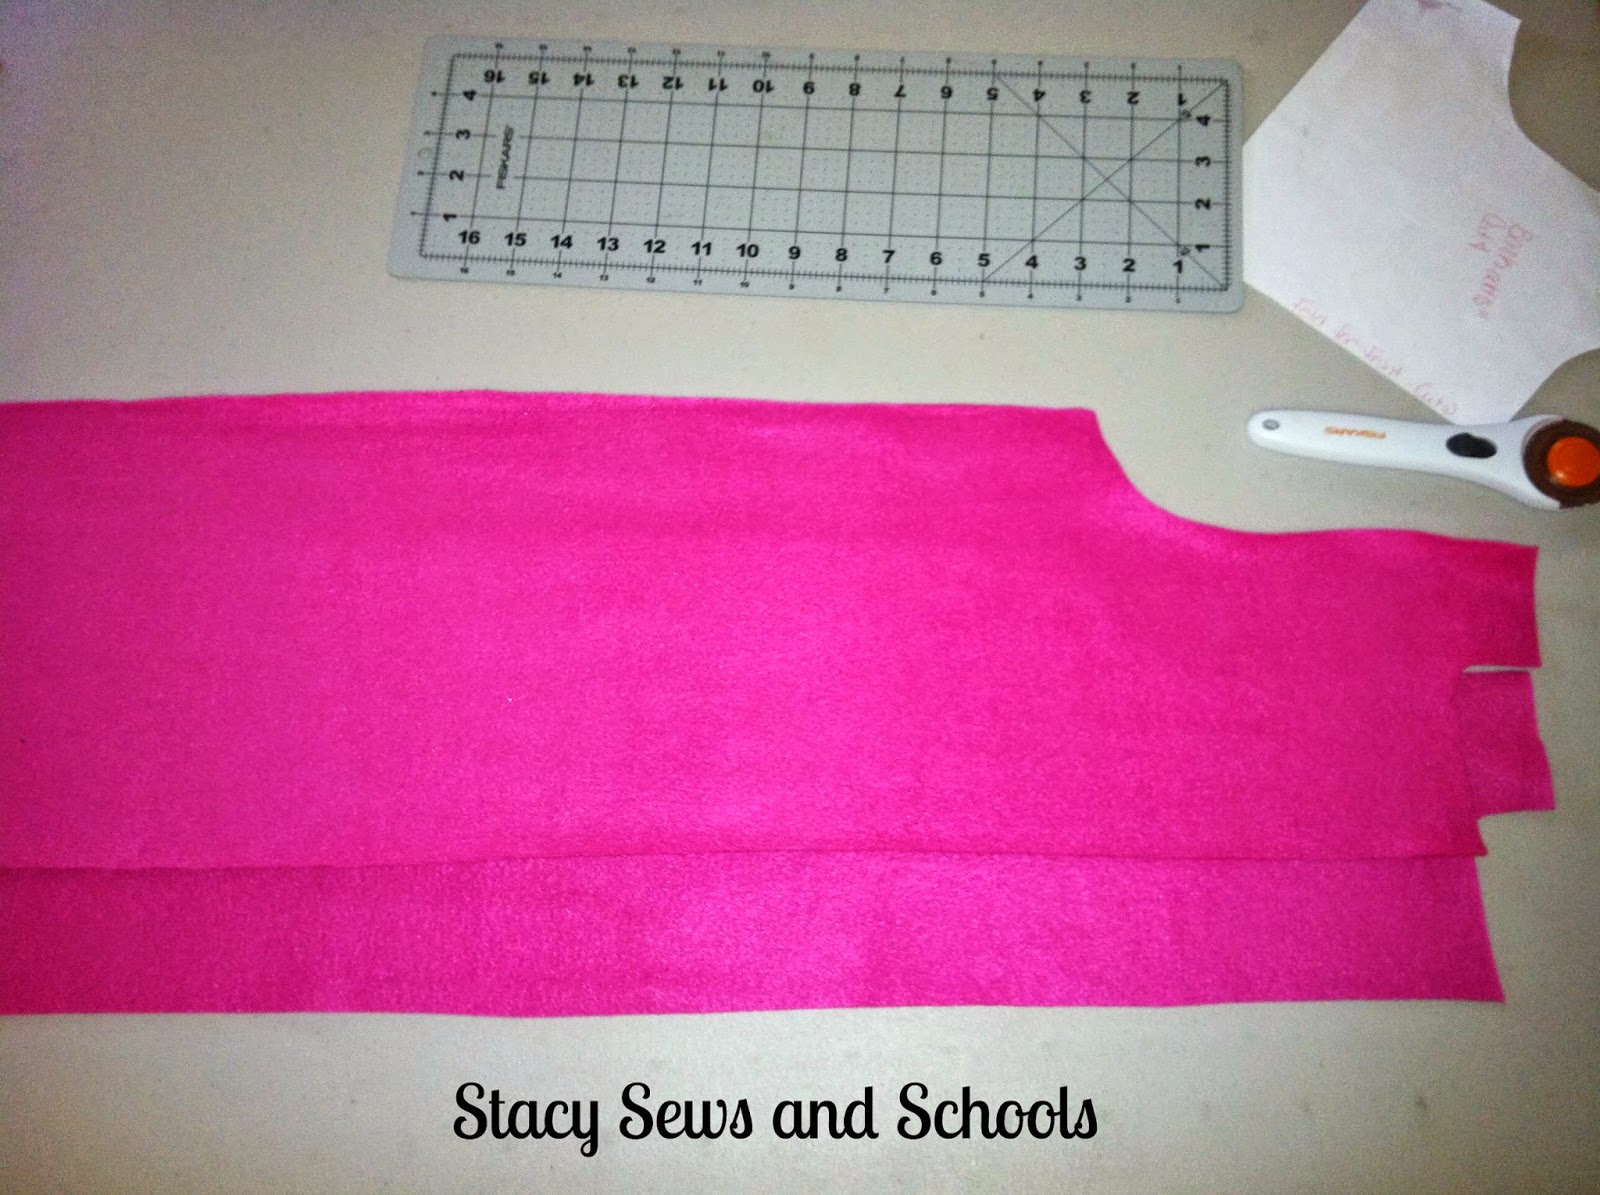
I cut 2 pieces for the front. 


This picture shows the curve of the front pieces. 


STEP 3


This is where you'll cut a circle for the top of the cape. I was scared of this at first but it was actually very easy!!

Fold the remaining fleece into fourths.


STEP 4


Measure from your child's neck to where you want this part to fall. For Cailey it was 17".

Place your measuring tape about a 2" from the corner and start marking a curve 17" down. 

Cut a curve at the top and cut the big curve at the bottom.


STEP 5


Open it up and cut straight down the middle to the neck.


STEP 6


Pin the shoulders and sides together and sew the seams.


STEP 7


Now, the neck line was very large but that's good! I made a big pleat in the back and top stitched it down.

Why was that good? It gives the back a lot of volume while pulling the front and giving it even more of a curve. 


STEP 8


Lay the circle part on top of the main cape, wrong side to right side. Pin it in place and sew them together.


STEP 9


I forgot to take pictures of how I cut the collar.

I cut 2 pink pieces and one smaller black piece.

Sew the pink pieces together and turn right side out.

Top stitch the black piece in place.

Cailey's collar was about 17" long and 3" wide.


STEP 10


Now, pin the collar to the cape, right sides together.

Sew in place.


This is how it looks when you're done.

You can always go back and stitch in the ditch if you like.


STEP 11


Next, I pinned the trim to the right side of the top of the cape, just along the curve. You can go all the way up the sides to the neck if you like, I just didn't buy enough trim. LOL I never would have thought that i would need more than 4 yards!!!! 


STEP 12


Remove the cat from your work area and sew the trim in place!! 

ARGH!!!!!


STEP 13


Pin the frog in place and sew the loops down with a zigzag stitch. 


YOU'RE ALL DONE!!! 

Well, you can go back and hem the cape if you'd like but fleece won't fray. ;)


Cailey absolutely loves it and asked if she could wear it all the time once Halloween is over. LOL


NOW! It's time to check out all the Halloween awesomeness from my friends! ;)


I LOVE THESE SOOOOOOO MUCH!!!!! They are Bloody Buddies from Karen at Baking in a Tornado. So stinkin' cute!!!!


Check out this gorgeous Nevermore Wreath from Someone Else's GeniusLOVE IT!!!!


This is the cutest thing!! A Halloween Gate from Shellybean at Follow Me Home.

I need to make this for my mantle!


Lydia at Cluttered Genius shows us how to decorate on the cheap!! I am allll for that!!! ;)


Melissa from Home on Deranged will show you how to have a VERY fun, Not So Spooky Halloween!! FUN!!


                   HAPPY HALLOWEEN!!!!!!