Showing posts with label crafts. Show all posts
May 5, 2015
May Flowers Wreath DIY
I was in desperate need for something for my front door after Easter. I wanted something that I could use for a while and not have to worry about it.
Finally I got this idea in my head about using an old watering can and flowers!
Off I went to the craft stores to see what I could find.
I hit the jackpot at Michael's. They had just what I wanted!
What I Used
1 foam wreath thing
1 silver watering can/pitcher
1 spool of green ribbon
1 spool of burlap
Leftover green felt ribbon
3 flowers
Hot glue gun
Step 1
Start wrapping the burlap around the foam wreath form. Make sure to overlap it so you can't see through the burlap.
Step 2
Hot glue the end in place.
Step 3
Loop the ribbon through the handle of the watering can/pitcher and hot glue in place.
Cut a piece of ribbon and make a loop. Hot glue it to the back of the wreath.
Step 4
You should probably do this step before the last step but I didn't know I was going to add the green felt ribbon until I was done. ;) It just didn't look finished so I sent a pic to Eileen from Eileen's Perpetually Busy and asked her what she thought.
She suggested adding the green ribbon. She was so right! It makes a big difference.
Anyway, just wrap the green ribbon around, making sure to hot glue in place.
Step 5
Add the flowers and you are DONE!!!!!
A simple but elegant addition to your front door! :D One that you can use all spring AND summer if you want!
HAVE FUN CRAFTING!!!!!
April 28, 2015
DIY Shabby Chic Bird Cage
One day I was in Joann's and saw this:
I fell in love with the idea but knew I wanted to do it a bit differently.
By the way, Joann's has a ton of craft ideas both in store and on their site. Check it out!!
This is what I used along with some cardboard and scrap fabric.
I found the birds at The Dollar Tree and that great scrap fabric ribbon at Hancock's.
Step 1
I cut 2 pieces of cardboard and hot glued them together.
Then I wrapped the pieces in the scrap fabric and hot glued it down.
Step 2
Next, I hot glued a piece of ribbon at the end of the floral wire and wrapped it up, hot gluing the end as well.
I did that to about 5 pieces of the floral wire.
Step 3
I inserted 2 pieces of the wrapped floral wire into the cardboard.
Then I hot glued one bird to the bottom of the cage.
Next, I took clear thread and tied it to the other bird. After that, I tied it to the top of the cage.
Step 4
Then I inserted the rest of the wrapped wire.
Next, I hot glued the scrap ribbon along the bottom of the cage.
I then took a different color scrap ribbon, twisted it and glued it around the outside of the middle of the cage.
Lastly, I took a small flower and hot glued it to the top.
ALL DONE!!!! A sweet, shabby chic bird cage!!!! Perfect addition to your spring home decor.
So, what do you think???
I know, I know... The blog title says sewing and schooling but I love a little crafting, too!!! I'll be getting back to sewing tutorials VERY shortly. I have a few ideas that I want to try out for Cailey and Colin.
HAVE FUN CRAFTING!!!!!
February 10, 2015
Blog with Friends - Creative Cupids - King and Queen of Hearts Crowns
Welcome to this month's Blog with Friends post!! This month we are the Creative Cupids and will be bringing you tons of Valentine's Day fun!!
For my part, I will be showing you how to make these King and Queen of Hearts Crowns. Just because I used a sewing machine doesn't mean YOU have to. You can use a glue gun or fabric glue to achieve something similar.
WHAT I USED
Sheets of felt in Valentine's Day colors
Iron on interfacing
Iron on stars
Plastic gems
Flower trim
STEP 1
Cut one piece of felt in half.
STEP 2
Sew the ends together.
Fold in half and sew a long seam.
Turn right side out.
STEP 3
Take a sheet of felt and cut the interfacing to fit. Iron on the interfacing.
STEP 4
Fold the piece in half and cut out 1 large heart.
Repeat until you have 2 large hearts with interfacing and 2 large hearts without interfacing.
Then cut 2 smaller hearts with interfacing and 2 smaller hearts without interfacing.
In a different color, cut 4 hearts without interfacing. These will need to fit on top of 2 large hearts and 2 smaller hearts.
STEP 5
Now, take your hearts and put 1 interfaced heart with one heart without interfacing, matching up the sizes.
Sew together with a close zigzag stitch.
STEP 6
Place the other color hears on top and zigzag stitch in to place.
STEP 7
Measure the long thin piece to fit your child's head.
Cut and sew the ends together.
STEP 8
Add embellishments to the hearts.
STEP 9
With the pink crown, I cut 1 large heart with interfacing and 1 without. Then I cut 2 smaller hearts with interfacing and 2 without.
ALL DONE!!
Now! On to all the FABULOUS posts for this month's Blog with Friends!!!

Karen at Baking in a Tornado has a recipe for these SOOOO CUTE, SOOOO YUMMY, Hugs and Kisses Cookies.

Robin at Someone Else's Genius will show you how to make this GOOOOORGEOUS Love Cage Captured Chaninmaille Bracelet

Robin over at The Momisodes has a Love Poem for you. You definitely don't want to miss THAT!!!

Lydia from Cluttered Genius is going to show you how to Repurpose Wedding Petals. SOOOO pretty!!!!

Christy at Uplifting Families has some Sweet & Salty Valentine's Day Popcorn. YUM!!!
HAPPY VALENTINE'S DAY!!!
Labels:
Blog with Friends,
craft,
crafts,
Crowns,
DIY,
february,
felt,
kids,
Love,
sew,
valentine's day
February 2, 2015
Valentine's Day Fun Learning Resources
WOW! Valentine's Day is coming up VERY soon!!! Seems like just yesterday it was Christmas!! Are the days going by faster????
I have put together a great list of Valentine's Day printables and activities! I can't wait to try them out!!
Here is a great list of books at Amazon. Some of our favorites are Splat, There Was an Old Lady Who Swallowed a Rose, and I Love You, Stinkyface.
PRINTABLES
Love Quotes Copywork
The History of St. Valentine's Day
There Was an Old Lady Who Swallowed a Rose
Q-Tip Painting Pages
Math Games (Toddler to 4th Grade)
Montessori Inspired Printables
Do a Dot Printables
Color by Number Pages
Love Tot Pack
Learning Pack (Pre-K to 1st)
History of St. Valentine's Day (Pre-K to 5th)
I <3 Trucks Pack
ACTIVITIES
9 Heart Experiments
Montessori Activities
30 Crafts and Activities
Toothpick Structures
Heart Art
Montessori Inspired Activities
Valentine's Slime
Valentine's Playdough
Science Experiments
Love Potions (Science Experiments)
Facts, History and Symbols
Crafts
Heart Bird Feeder
History of Valentine's Day
FOOD STUFF
Cupid Floats (We are SOOO doing these!!!)
Rice Krispie Treats
21 Healthy Valentine's Day Treats
Robot Treat
Learn about the Heart
Montessori Heart Actvities
Info and Activities
Activities, Printable and Videos
Circulatory System Lessons (Printables and Activities)
Circulatory System Notebooking Pages
Worksheets
Cardiovascular System Actvities
Infographic
Heart Activity
How the Heart Works Activities
Heart and Circulatory Activities
Videos
Videos
HAVE FUN LEARNING!!!
January 19, 2015
Snow and Ice Resources for Learning Fun
So it's that time of year!! Time for some snow fun (if we ever get more than a dusting)!!! But watch out for that ice (that we've had too much of).
I have put together a list of resources for some learning fun!!!
All the resources listed are either FREE or very cheap.
The books should be easily found at Amazon or your local library.


Snow and Ice Pack
Snow and Ice Printables
Snowman Preschool Pack
The Snowy Day Printable Pack
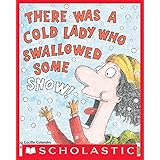
There Was an Old Lady Who Swallowed Some Snow Printables
Winter Coloring Pages, Crafts and More
Winter Literature Units
Winter Printable Pack
Winter Printable Packs
Winter Printables and Coloring Pages
Winter Tot Pack
Winter Unit Study, Lapbook and Notebooking
Winter Worksheets and Printables
Subscribe to:
Posts (Atom)