Hi, all!!! How's the weather where you are?? Here it has been HOT!!! BLECK! I am NOT ready for summer. SIGH... We won't be spending any time around a pool this year and let's face it, that's the only good thing about summer.
Anyway, Cailey was complaining to me the other day that she didn't have enough summer PJs. Well, I knew exactly what to do about that! Time to make some!!!!
I got that cute print from The Fabric Fairy and it was on SALE!!!!! Can't beat that!!!
It's such a light weight knit that I knew it would perfect for some summer PJs. I just needed to decide what KIND of PJs.
Since the print is sorta busy, I decided to go with something simple.
I am SO GLAD I did. I LOVE IT!!! I can see myself making more like that and for Colin, too!!! This is absolutely unisex!
WHAT I USED
Light weight knit fabric (less than 2 yards)
3/4" elastic
Coordinating thread
2 large safety pins
Let me start out by saying this: I had started out using matching thread. I thought I found this great deal on Etsy.... Yeah, you've heard if it sounds too good to be true it probably is???? Yeah... That's what happened... This thread was a NIGHTMARE. It kept breaking after every few stitches. GRRRR!!! So I had to go with a coordinating thread. Oh, well. The print is busy enough that you can't really tell anyway. LOL
Ok, here we go!
*NOTE* Make sure to always press your seams after you've sewn them!!! I always forget to say that! ;)
*NOTE* When sewing knits, it's always good to use a stretch stitch.
*NOTE* The only "special" thing you need to sew knits is a ball point needle. ;)
STEP 1

Grab a shirt that fits your child well. Just make sure yours is cat fur free, unlike mine... YEESH!! It didn't look THAT bad in person. SIGH...
Use the shirt as a guideline to cut your pieces.

When you cut the front piece, make sure the neckline dips in a bit more. ;)
STEP 2

Take a pair of shorts that fit your child well and use them as the guide for cutting your shorts legs.
Make sure to leave about 1 1/2 inches extra at the top for the elastic casing!

This is what they look like.
STEP 3

Cut 3 strips that are 2" in width and at least as long as your arms holes and neckline.
STEP 4

Now, with right sides together, pin and sew the shoulder seams.
STEP 5

With right sides still together, pin and sew the side seams.
STEP 6

Now, fold the hem of the top about 1/2" and press.
I then turned my right side out and pinned. Then I top stitched the hem. In my opinion it just looks nicer that way. ;)
STEP 7

Fold your fabric strips in half and press.
Now, starting at the center back of your neckline, pin the strips with right sides together and raw edges touching.
As you sew them together, pull gently. It will give the neckline a nicer look.
STEP 8

Do the same thing with both arm holes.
Start your pinning at the side seam.
That is what it looks like when they are done.
YOUR TOP IS DONE!!! YAY!!! Time to move on to the shorts! :D
STEP 9

With right sides together, pin the inseam.
You are just sewing from the bottom of the leg to the beginning of the curve of the crotch.
Sew the seam.
Repeat on the other leg.
STEP 10

Take one of the legs and turn it right side out.
Slide it down into the other leg. (Right sides will be touching.)
Make sure to match up the seams.
Pin in the place and sew the curve.
STEP 11

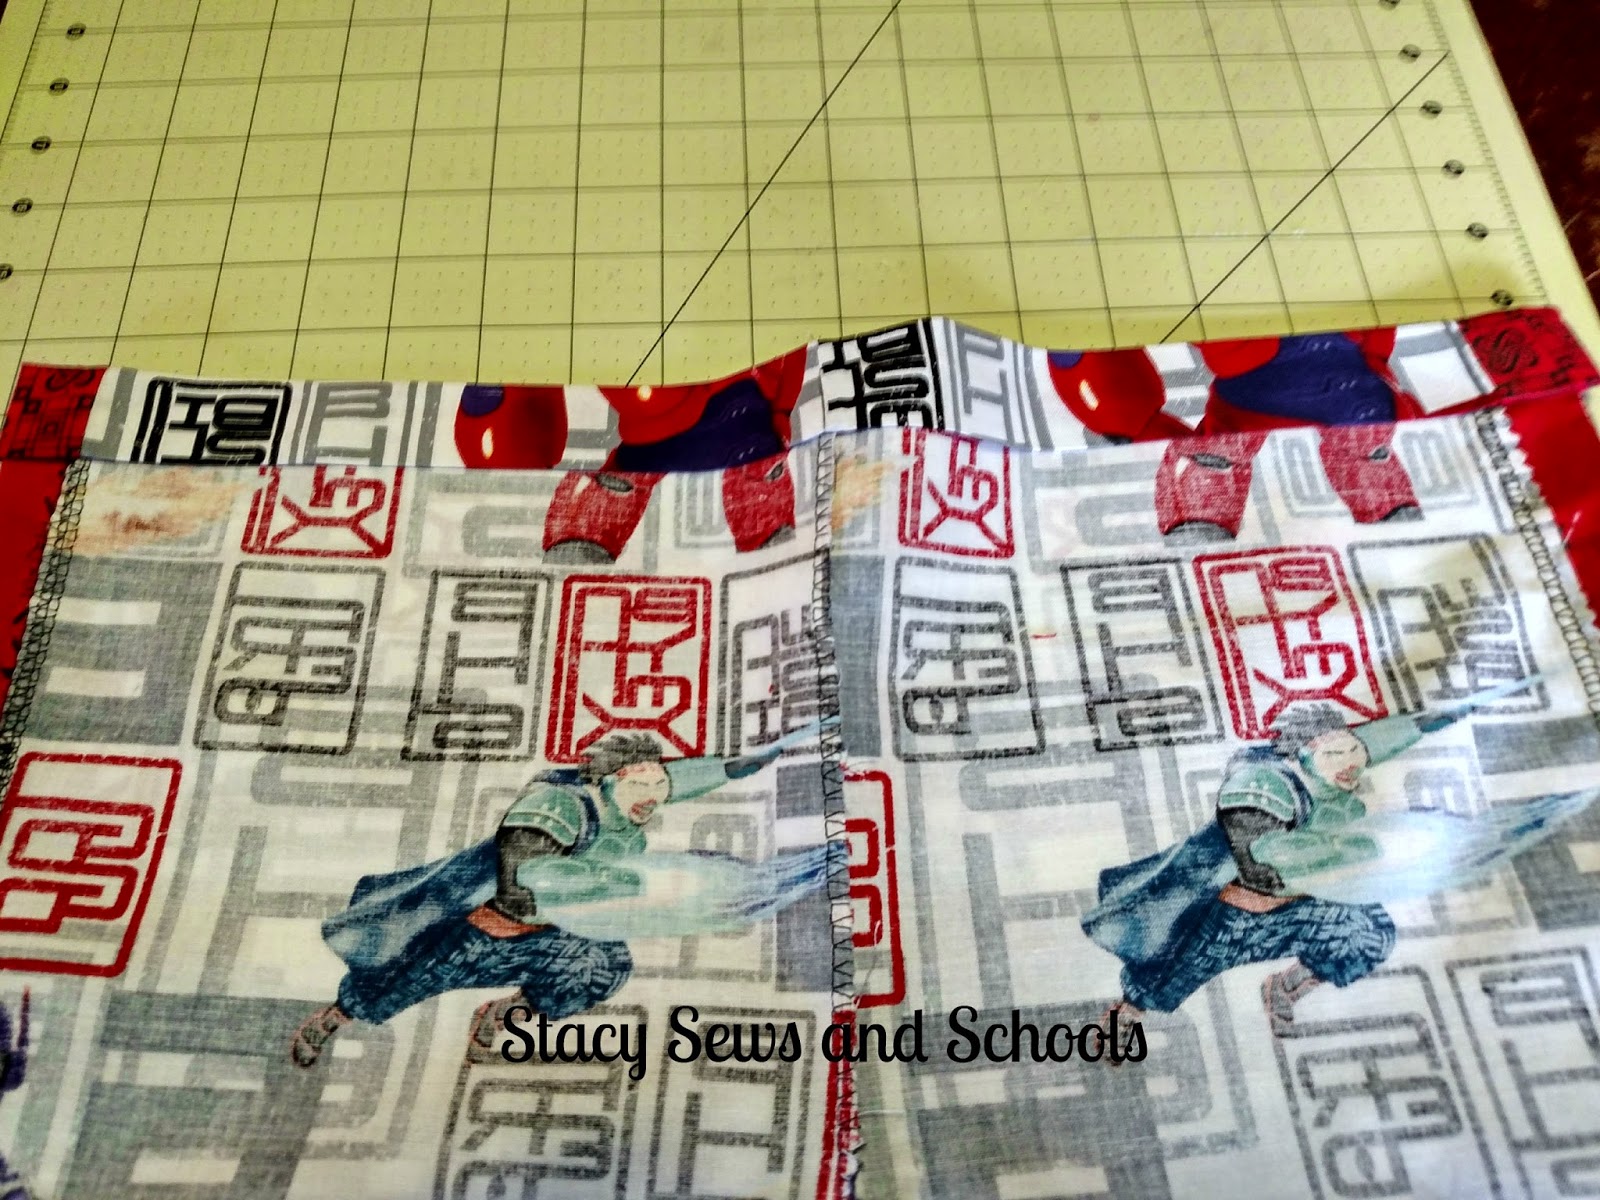
Time to make the elastic casing!
Turn your fabric down 1" and press.
Sew close to the bottom edge.
Make sure to leave an opening to insert your elastic.
STEP 12

Take 2 large safety pin and pin one to each end of the elastic.
Push the elastic through, holding on to the opposite end.
Pull both ends out of the opening and sew them together.
Push it back inside the casing and sew the opening closed.
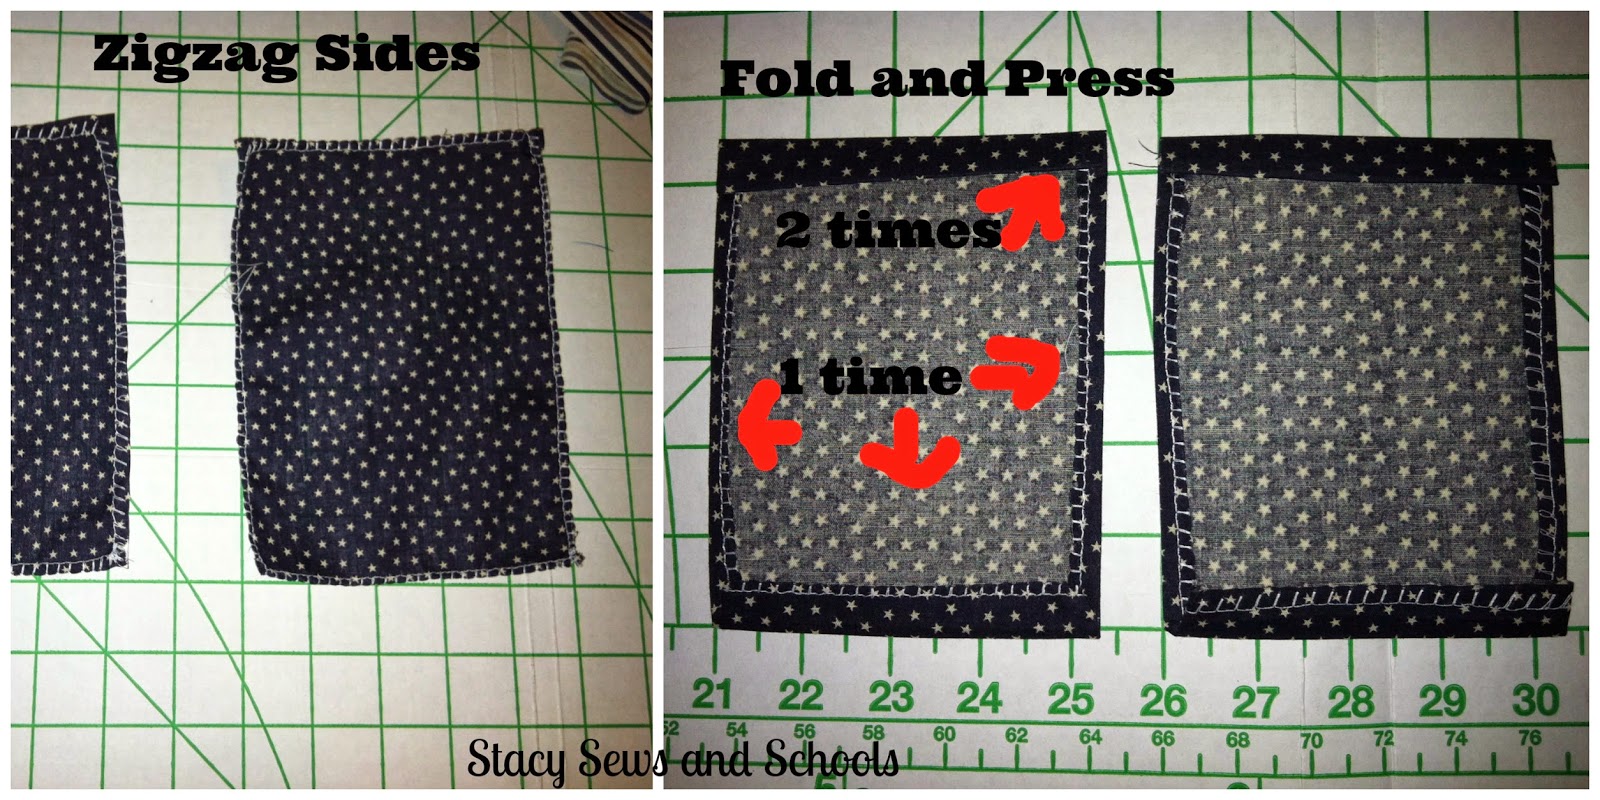
STEP 13

Almost done! We just need to sew our hems!!
With the shorts right side out, fold the bottoms in 1/2" and press.
Pin in place and sew the hem!
You CAN do this wrong side out, I just think the hems look neater when they are top stitched. ;)
ALLLLLLLL DONE!!!!!!!!!!!!!!!!!!

Now you have some cool and comfy summertime pajamas!! YAY!!!!
The great thing about this is that you can make them for anyone of any age. I think I might make myself some! ;)
If you have any questions, don't hesitate to ask!!!!
HAVE FUN SEWING!!!!!