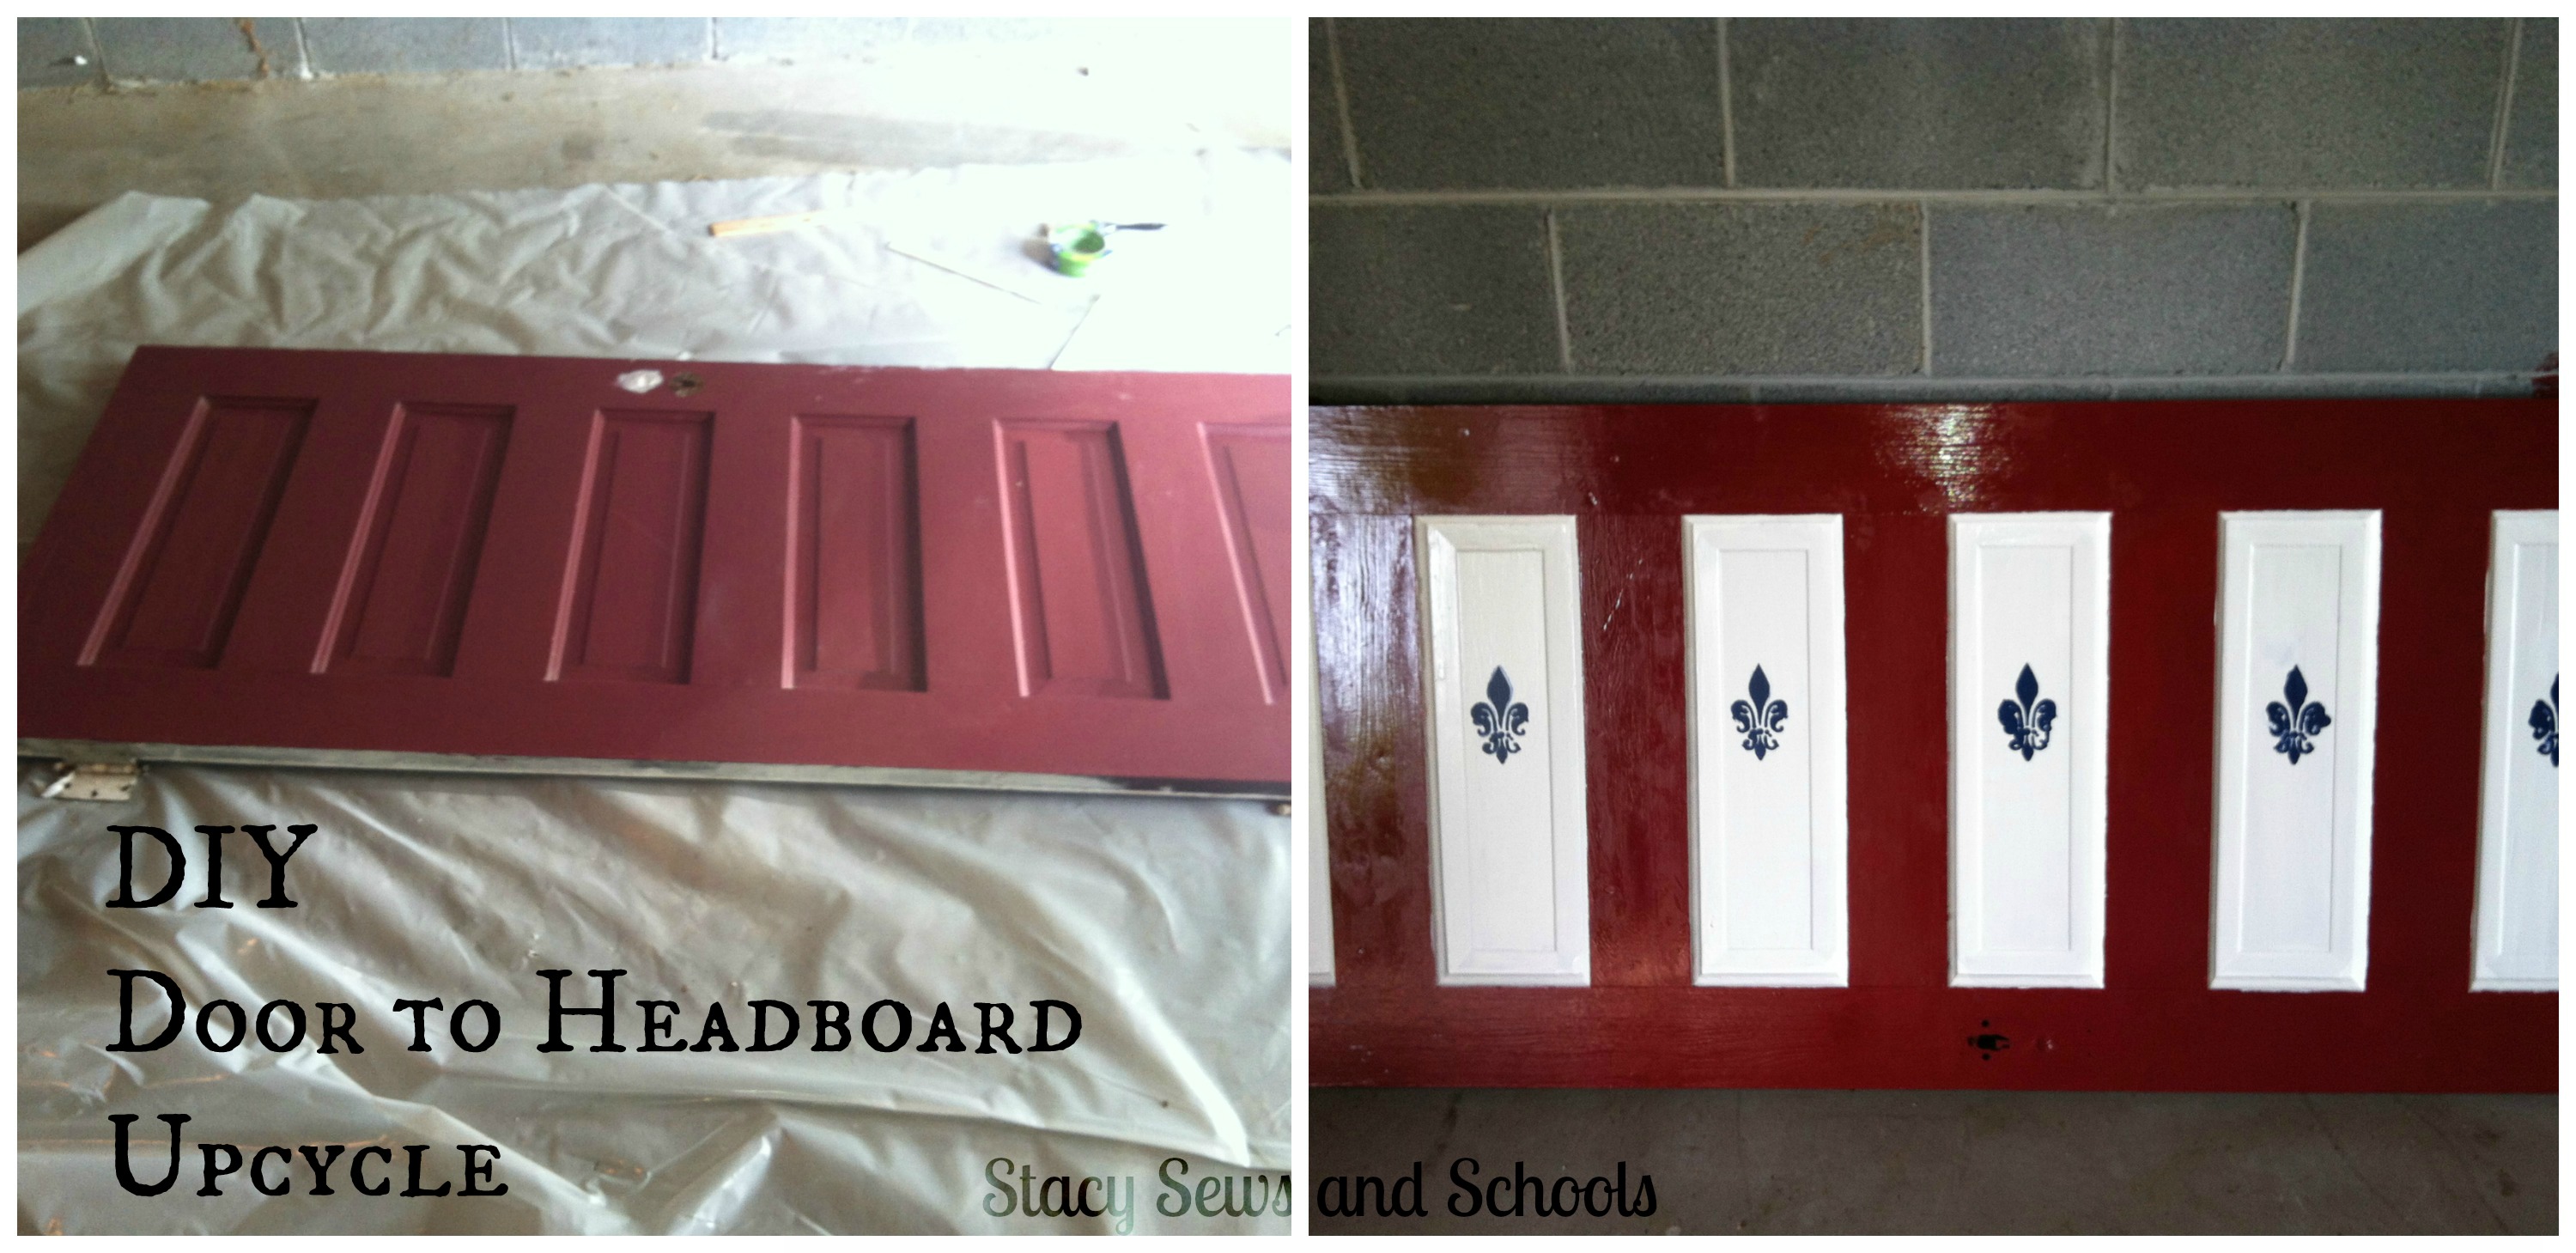
We recently gave the girls our old bed set and changed out our bed clothes. Now we needed something to match!
I have been seeing a lot of DIY headboards on Pinterest and knew that I wanted to give it a try.
The simplest way seemed to be the door to headboard upcycle. I knew we had an old door in the garage so that was PERFECT! All I needed was the paint! ;)
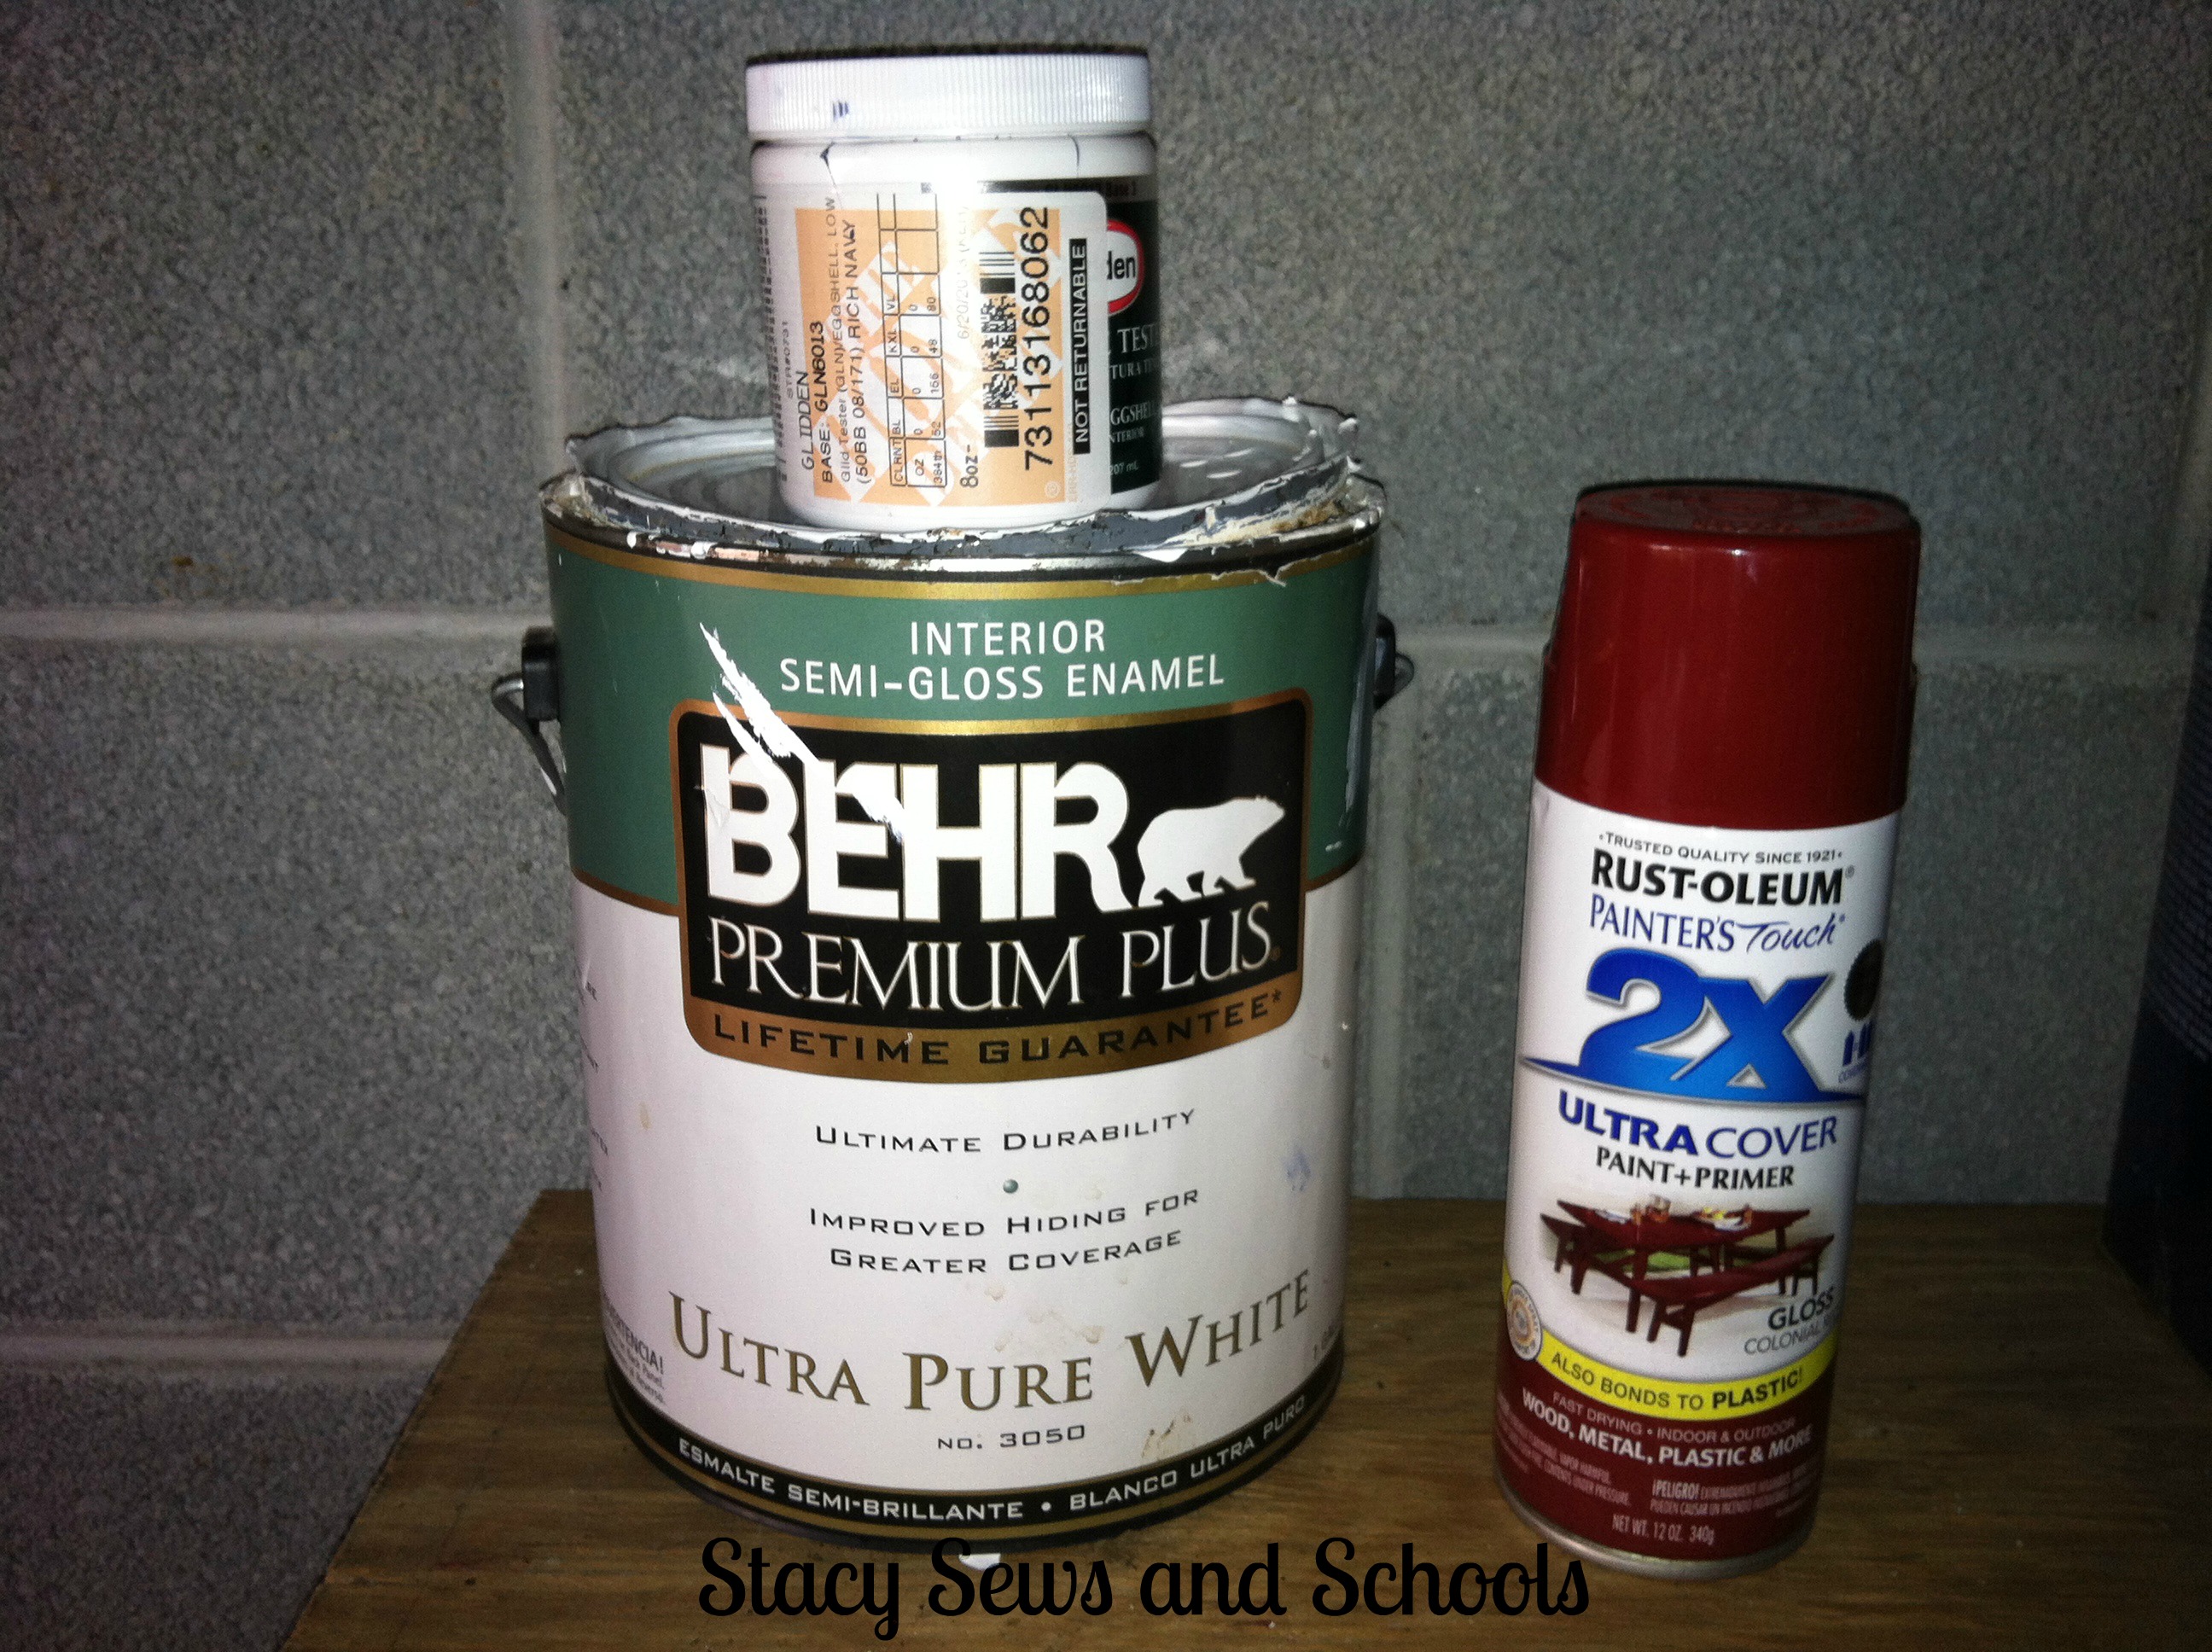
We had some plain white paint sitting around in the cupboard under the stairs, so I grabbed that! Then I got some Rust-Oleum Painter's Touch in Colonial Red. It has Primer built in! Then I grabbed a sample of Glidden Rich Navy for the stencils.
The stencil I picked up at Home Depot. It had 3 different designs but I was partial to the fleur de lis.

First I sprayed 2 coats of the Colonial Red. No sanding, no priming. Just painting! ;)
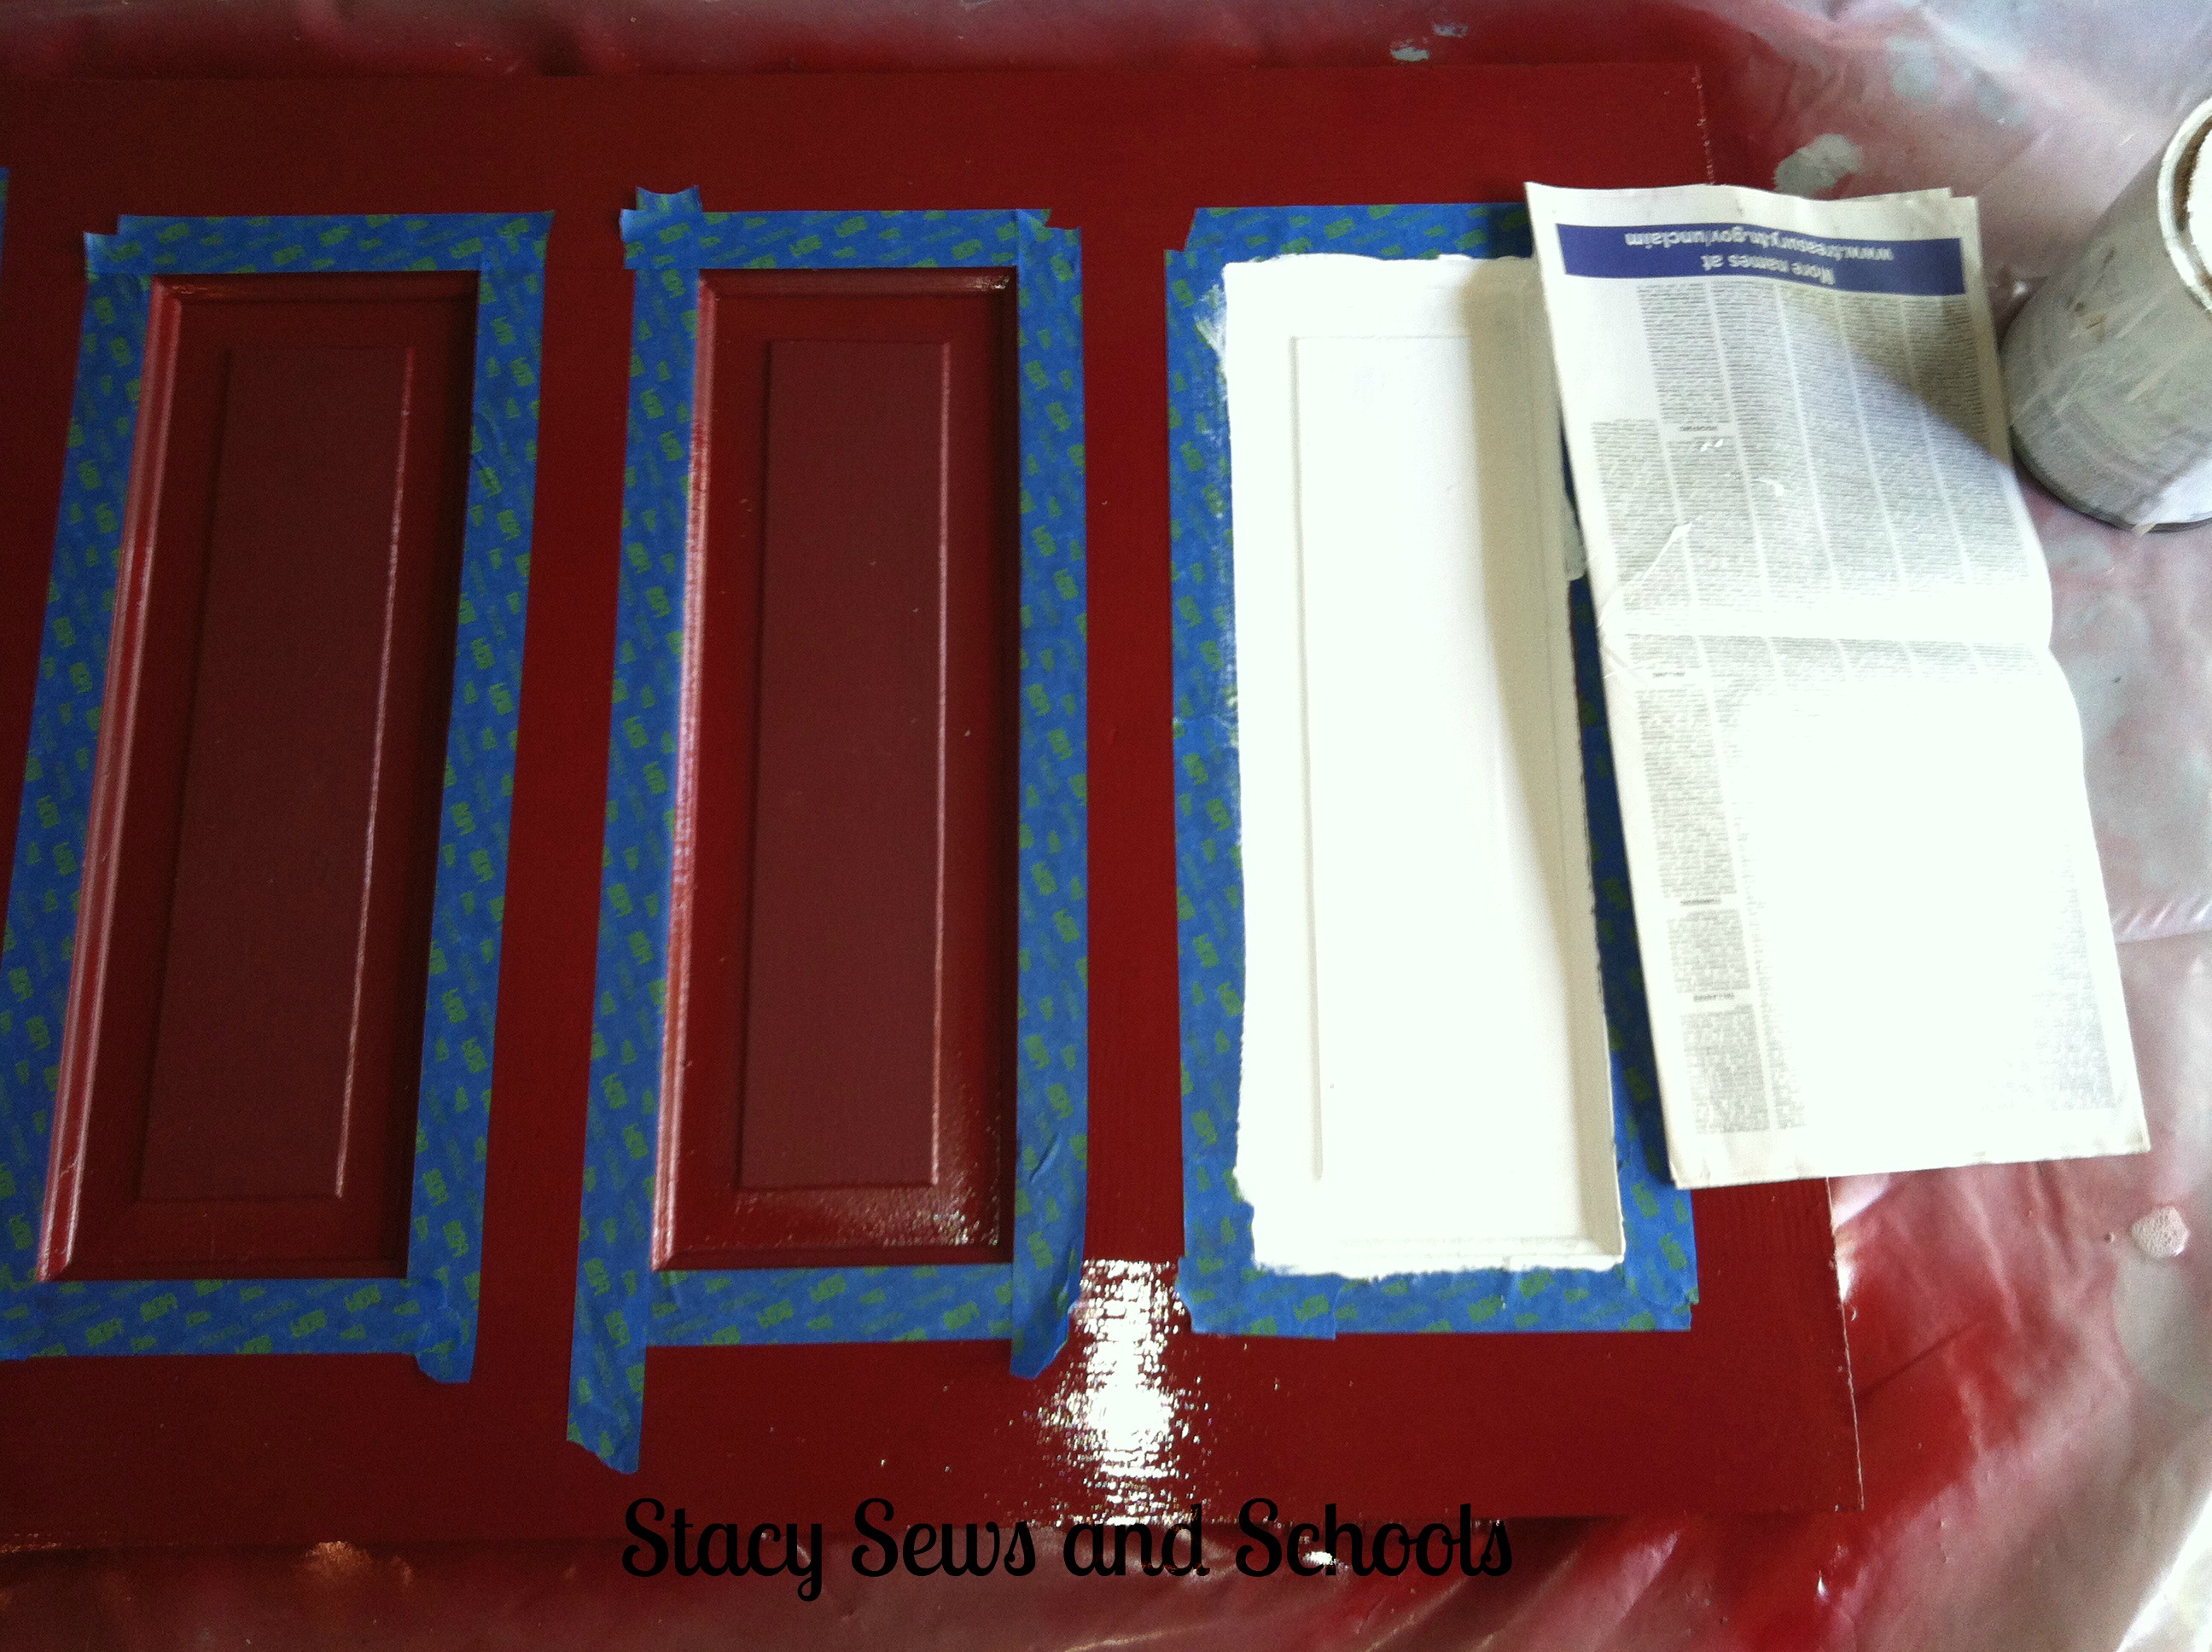
After the red was good and dry, I taped around the middle sections and added 2 coats of the white.
I had a bit of an issue with the tape. I used Scotch brand and expected good results. Instead, the white bled through the edges and the tape left a sticky residue on the red paint. GRRR!!!!!!!
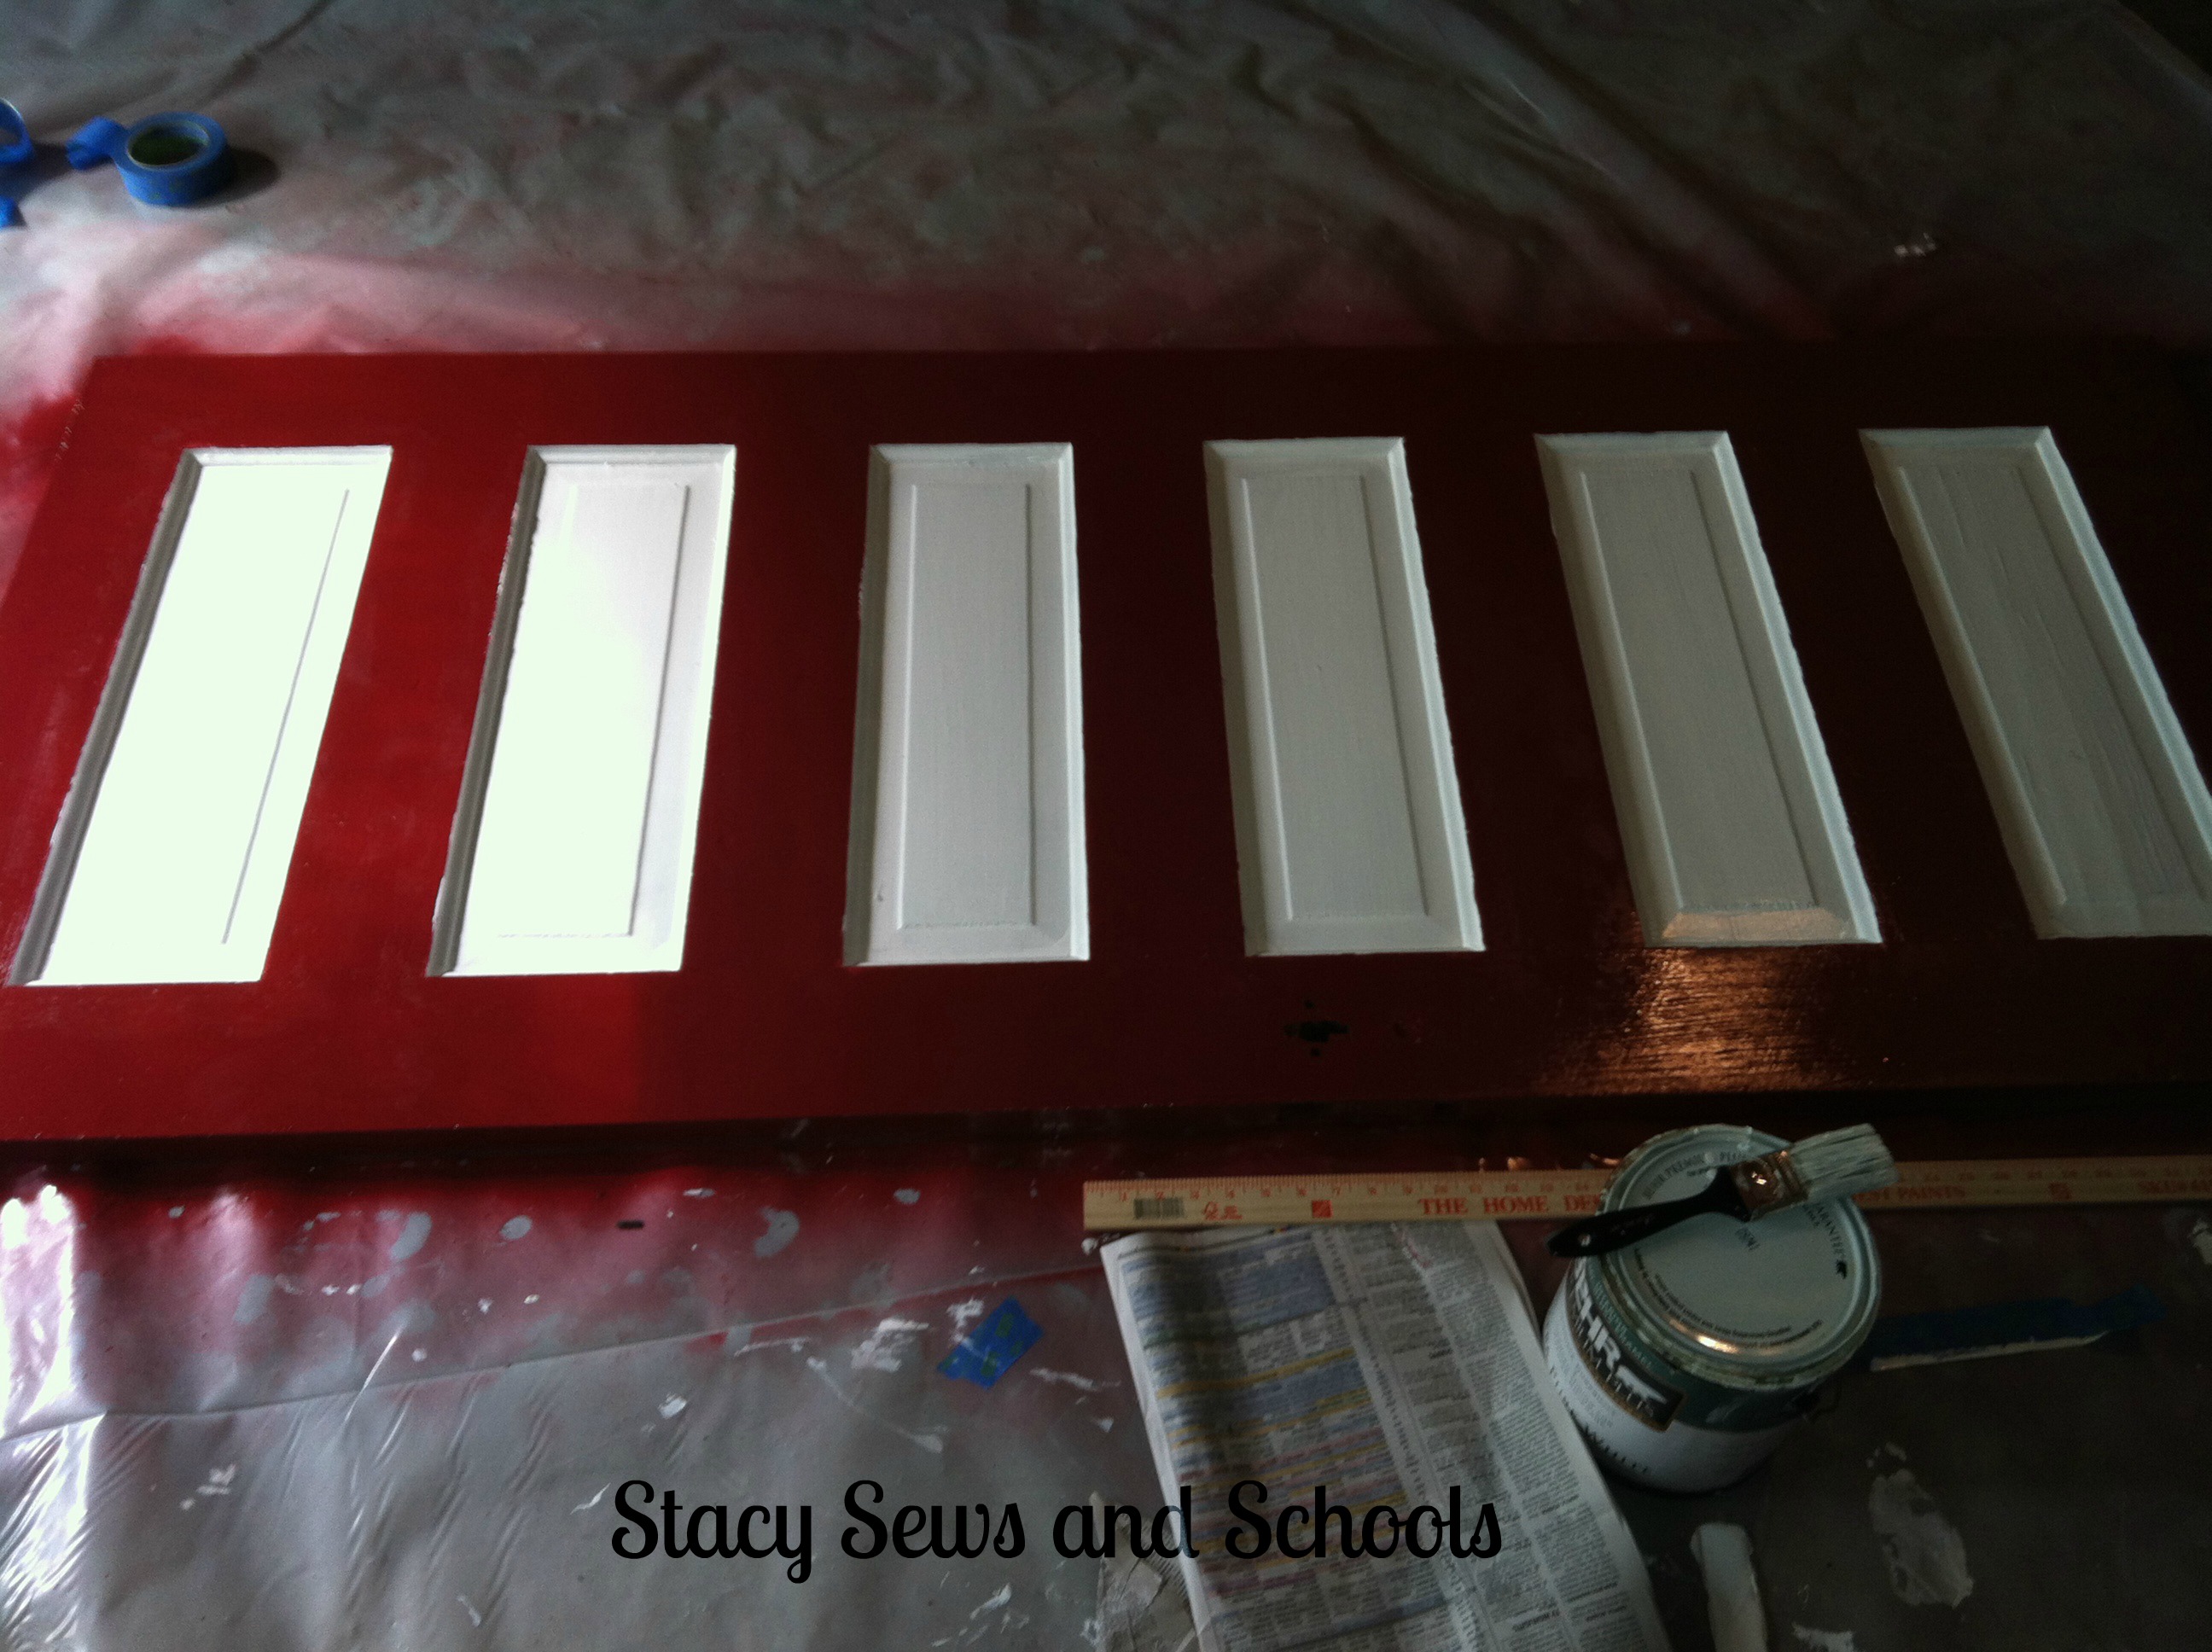
I did a little bit of touch ups.
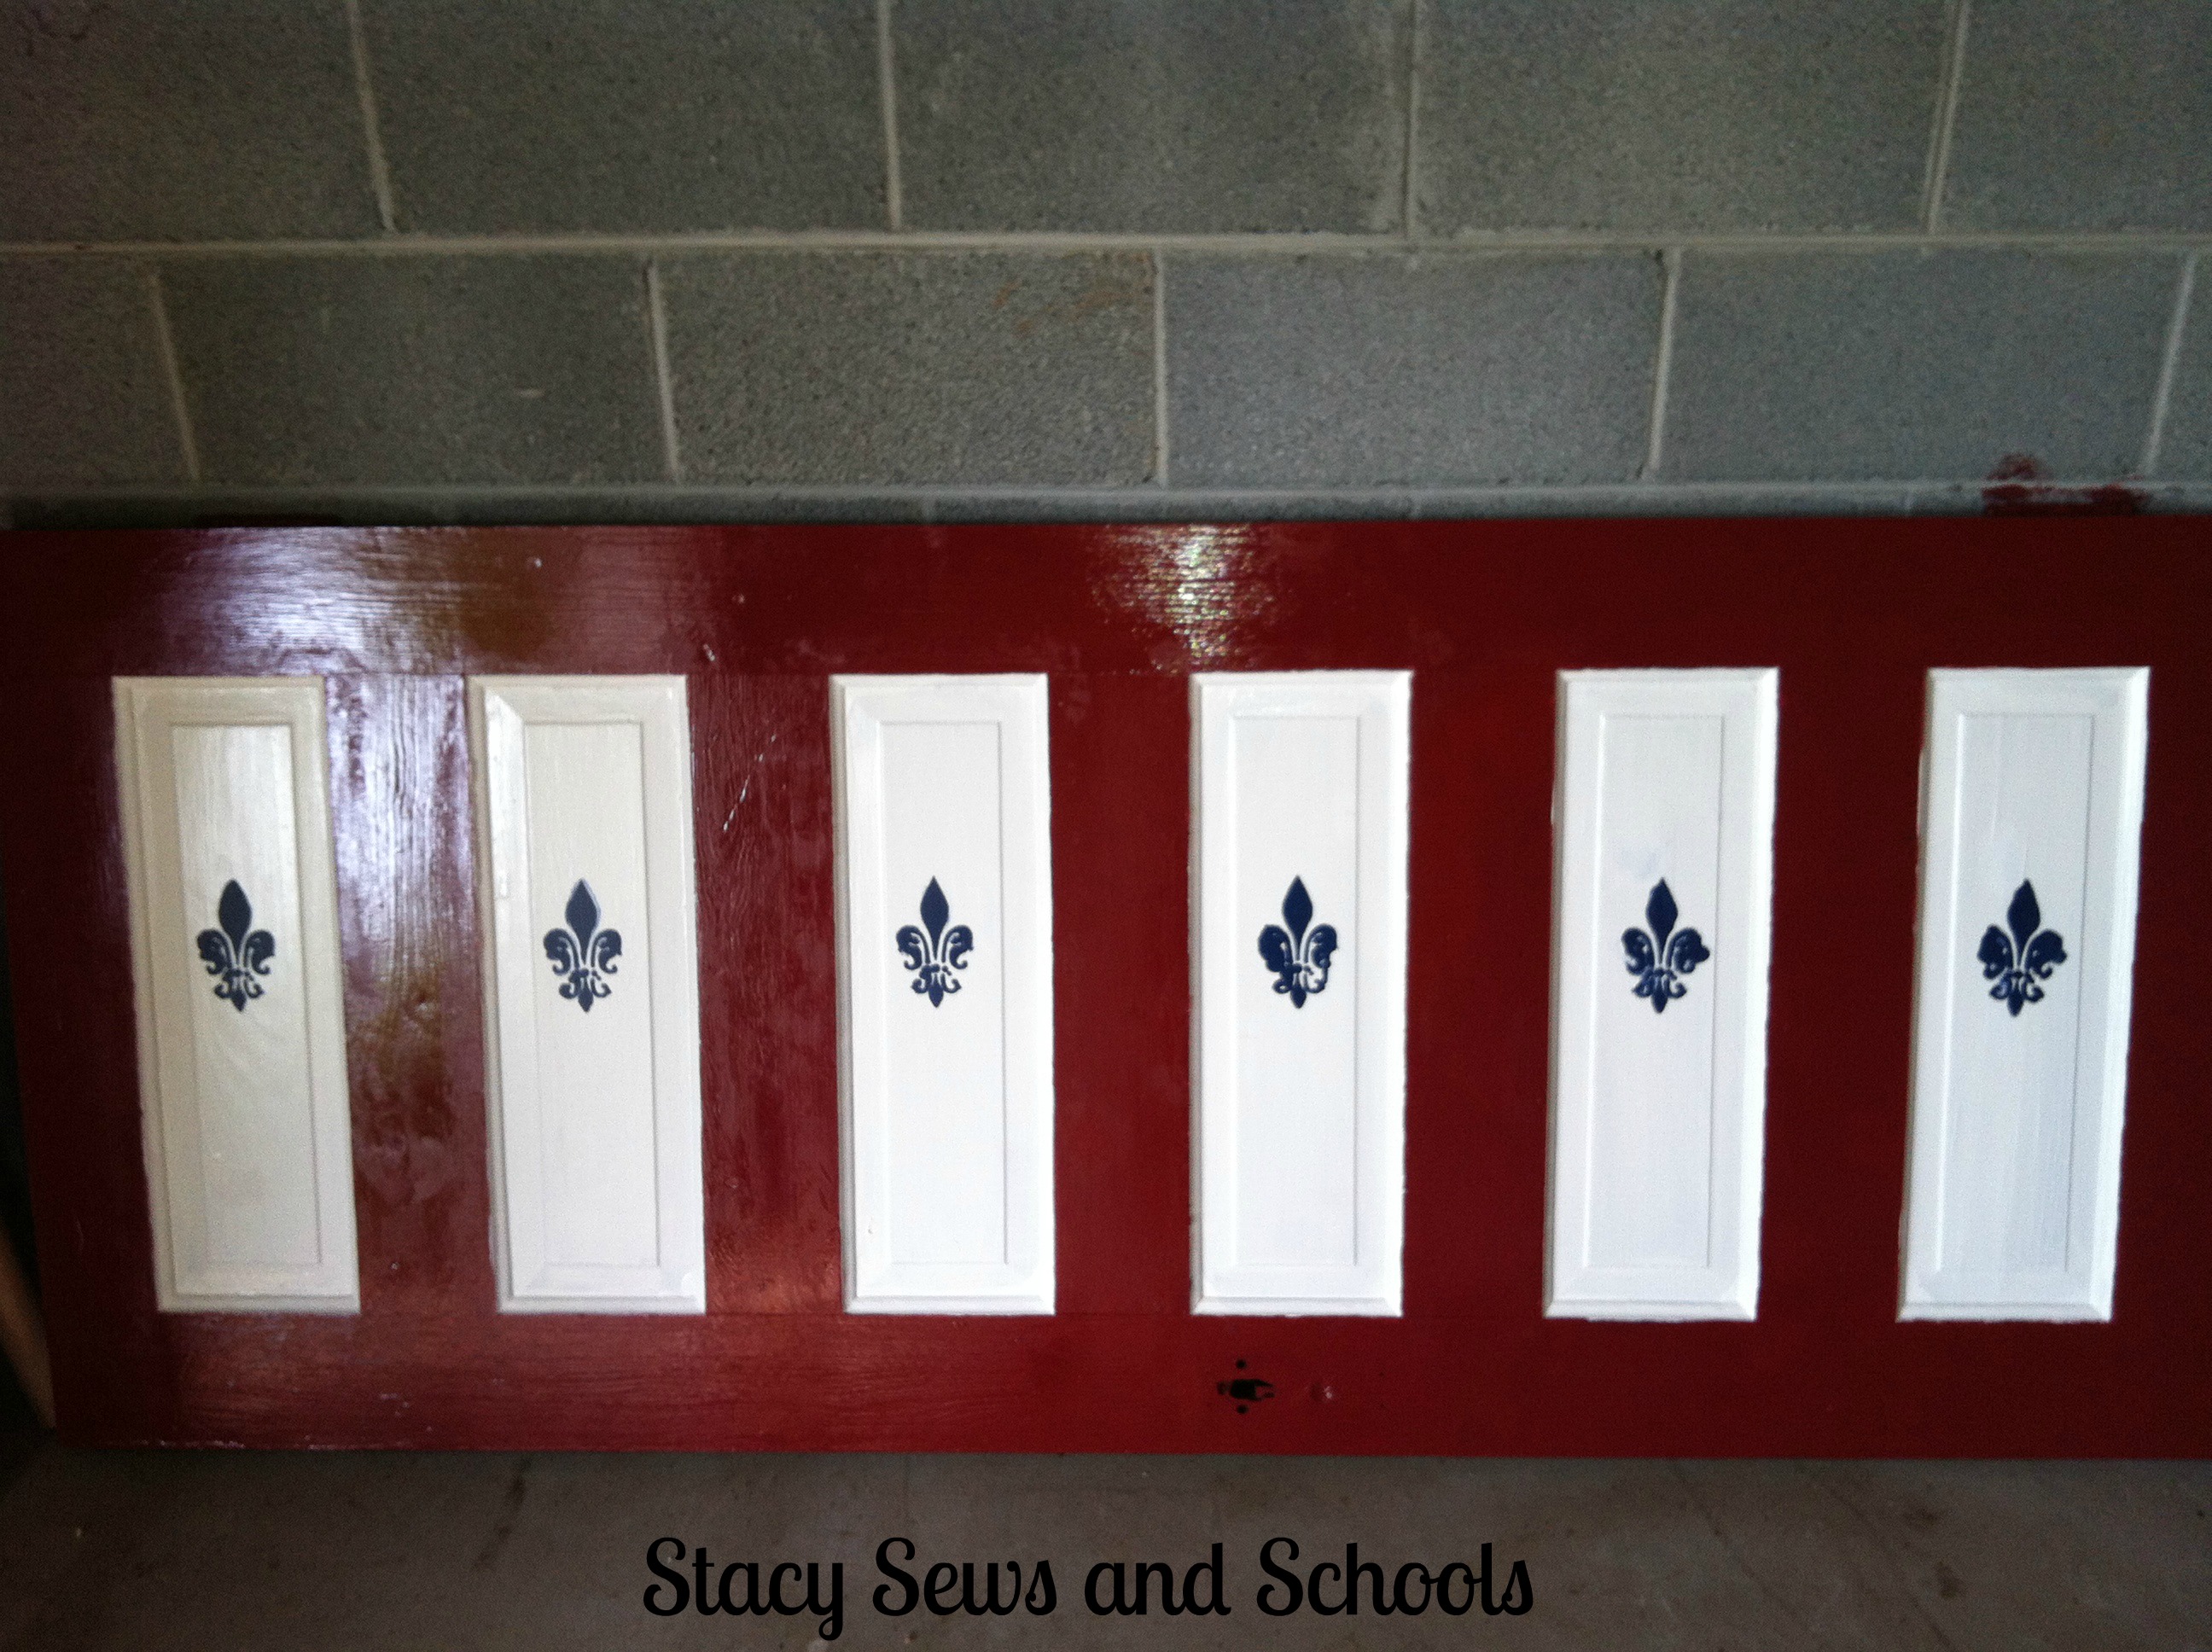
Next I added the stencil.
That was a bit harder than I imagined it would be. SIGH... I still have some touching up to do but I am pleased with the way it turned out over all.
Advice - Tape the stencil very securely and start with just a small amount of paint. ;)
I wish I could show you how the headboard looks actually on the bed, but we can't seem to find our screws!! ARGH!!! I will be getting it up in a day or two and will be sure to take some pictures then! :)
I hope this all made sense! I am up at 2 am writing it all out! LOL

Such a cute idea! I was just looking at our bed and thinking how much I would love to just burn the thing! LOL! It's so uncomfortable, and really too big for our room... You've inspired me! Haha!
ReplyDeleteLOL, Heather!!!! Then go for it!!!! ;)
ReplyDeleteI was sick to death of ours. BLECK!!! It was definitely time for something drastic!
You did such a beautiful job. I love having something that I know I made (or repurposed) myself.
ReplyDeleteAs far as the stenciling goes, I'm sure you did your homework before you started, but when I stenciled I used special paints (not runny) and brushes (flat topped) but most importantly, you don't "paint" the paint on but more dab and pat it on, That keeps it from going under the stencil.
THANKS!!!!
ReplyDeleteI did the dabbing and used a foam brush but I think I didn't have it taped good enough and used too much paint. :/ Live and learn... LOL
I love it, I think it turned out great!!
ReplyDeleteYour stencils are so perfectly even... that must have taken some precise measuring. It looks great and will be interesting to see it in it's final form.
ReplyDeleteTHANK YOU!!!!! :D
ReplyDeleteTHANKS, Kerri!!!
ReplyDeleteI measured twice, painted once! ;)
Hi there! I am co-hosting this week on the Raising Imperfection Sunday Link Party. Thanks for sharing your creations with us! I hope you found inspiration in all of the terrific posts.
ReplyDeleteI host a (Not SO) Wordless Wednesday Blog Hop and a TGIF Link Party at my place -- A Peek Into My Paradise... http://apeekintomyparadise.blogspot.com/ I would love for you to link up and follow if you like what you see. =) I follow back - I love making new friends!
I can't wait to see what you link up next week!
Hugs, Cathy
Thank you SO MUCH, Cathy!!!! I would love to be a part of the link up!! :)
ReplyDeleteHeading over to follow you now!
THANK YOU!
Very nice.
ReplyDeleteThank you very much, LaVonne!!! :D
ReplyDeleteThis is gorgeous... I love the red and blue stenciling.. Great job.. Can't wait to see photos of it up and in use.. Perfect idea..
ReplyDeleteThank you so much, Judy!!!
ReplyDeleteI hope we can get it put up soon!! I'm so anxious! LOL
It turned out beautiful, Stacy! I use spray adhesive when I stencil because I have a problem getting enough tape on also!
ReplyDeleteOH!! Great idea, Pam!!!!! Thanks!
ReplyDeleteWow Stacy ~ you did a beautiful job! What a clever way to use an old door!
ReplyDeleteThank you for linking to Raising Imperfection.
Please come back Friday to see if you were featured. :)
¤´¨)
¸.•*´
(¸¤ Lanaya | xoxo
Raising-Reagan.com
Thank you very much, Lanaya!!! :D
ReplyDelete[…] If you want to see the steps I took to make the headboard click HERE!! […]
ReplyDeleteWhat a cool idea for a headboard, I recently made one for us too but not with a door. Such a neat idea!
ReplyDeleteThank you for linking up to Raising Imperfection!
Make sure to check back on Friday to see if you were featured.
Leslie
www.violetimperfection.com
Thank you so much, Leslie!!! :)
ReplyDelete[…] I used the exact same paints and stuff that I used for the Door to Headboard Upcycle. […]
ReplyDeleteCute headboard! I've been wanting to make my own headboard too. These door headboards look awesome. I like your stencil. Hopefully you get it up soon.
ReplyDeleteThanks, Bethany!!!!
ReplyDeleteI have it up now with a chest of drawers to match! YIPPEE!!! ;)
Great idea! You're much more patient than I am with stencils. Thanks for sharing at I Made It! Monday. Can't wait to see what you link up this week.
ReplyDeleteThank you VERY much, Amanda!!!
ReplyDeleteNot sure about the patience, though.... LOL ;)