Showing posts with label bags. Show all posts
February 17, 2015
DIY Reversible Japanese Knot Bag
A few weeks ago a friend commissioned me to make her a couple of bags. She is a wonderfully talented crocheter and needed some bags to carry her projects in.
This is the first bag I made for her, a large messenger bag.
I completely meant to do a tutorial for it but I jumped in and started cutting and sewing before I remembered to take pictures! ARGH!! There goes my brain, again. :/
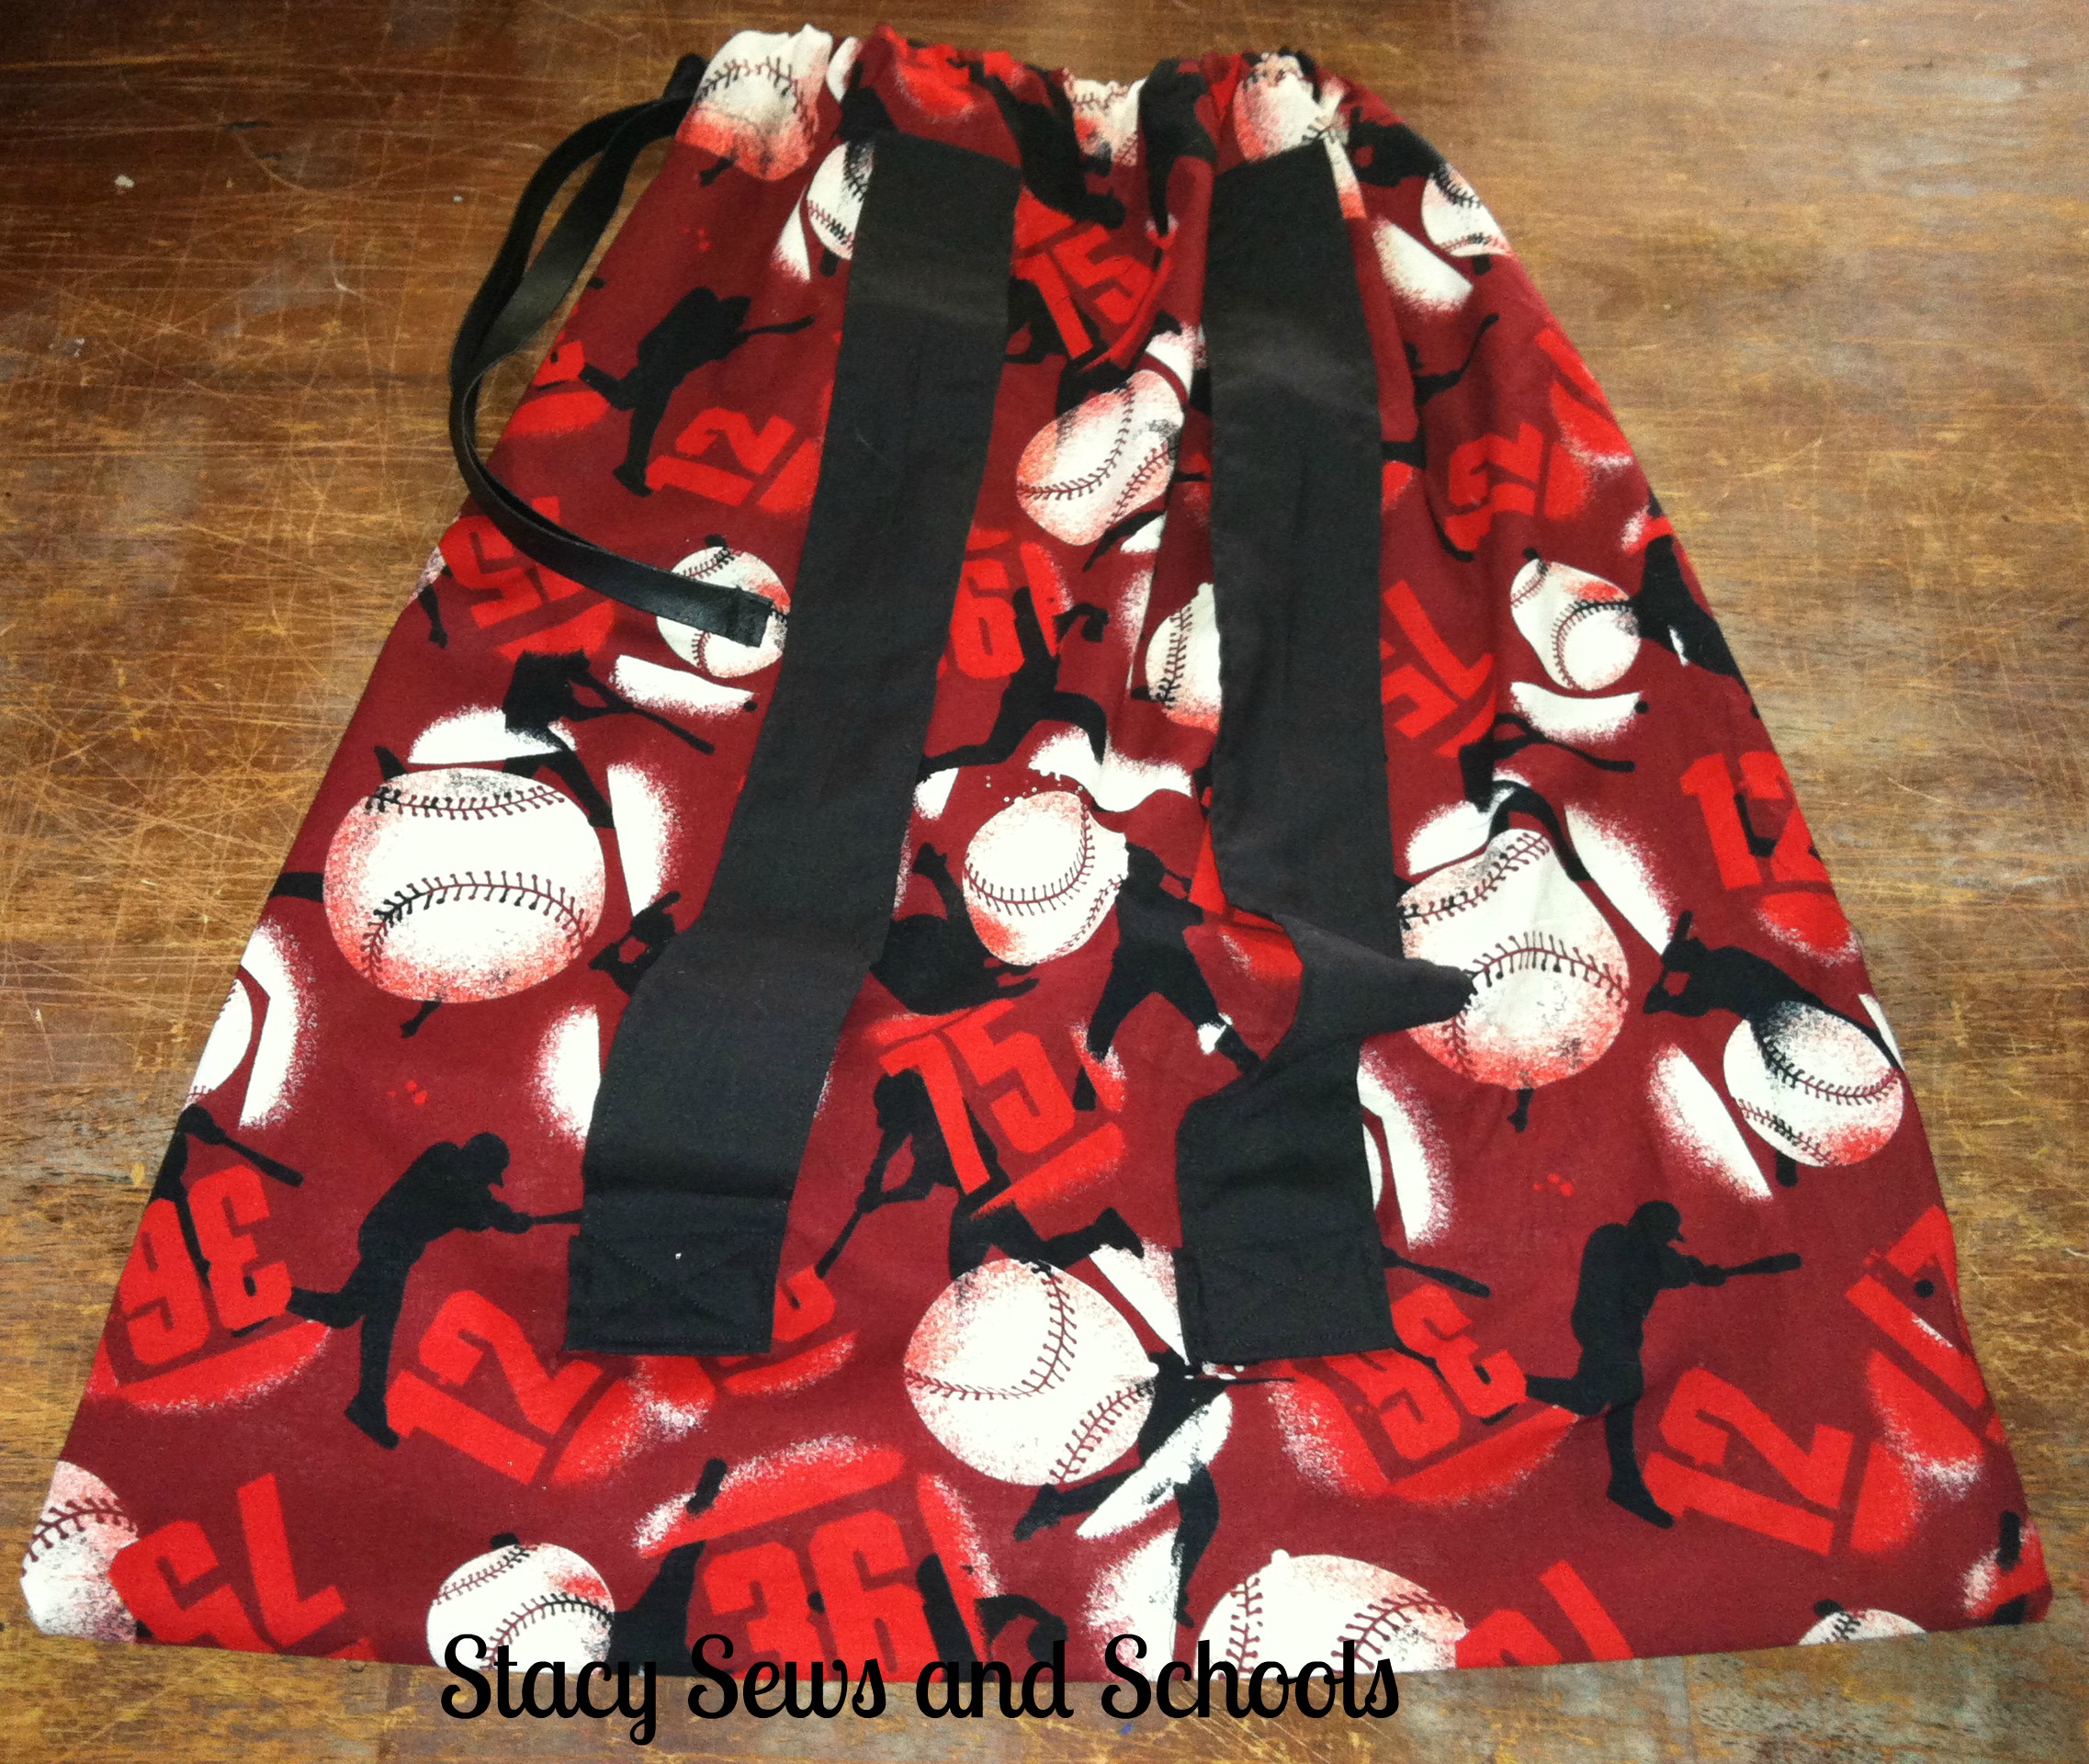
With the Japanese Knot Bag, I wanted a practice run before I made the real thing. That is what this one is.
WHAT I USED
1 yard main fabric
1 yard contrasting fabric
Paper bag to draw out the pattern
This Japanese Knot Bag is bigger than most of the ones you will see that are already out there.
STEP 1
This is where I free handed the pattern. I went through a couple before I got the one I thought would work the best.
The ONLY thing I would change would be the length of the handles. I think it would hang much better if at least the shorter handle was 2 inches shorter.
STEP 2
Cut 2 pieces from both fabrics.
STEP 3
With right sides together, pin and sew just where the red lines are.
Do this to both sets of pieces.
Trim the seam allowance down OR cut the curves.
I just trimmed it down to nearly nothing. It makes the curves look SO MUCH nicer.
STEP 4
Turn the lining right side out and slip it down into the main piece.
Now, pin and sew where the red line is.
Trim the seam allowance down OR cut the in the curves.
STEP 5
Turn the bag right side out, pushing the lining down inside.
Fold the edges in on themselves and press.
Pin and sew the handle edges closed.
Go back and top stitch the handles and the "neck" of the bag. If you like you can zigzag around the bottom curves of the handles. I did. I think it will make it sturdier.
ALL DONE!!!
Now you have a reversible Japanese Knot Bag!!!!!
Hopefully I will get the real bag done before this post goes live. It's been crazy around here, as normal. C&C have been sick since the middle of last week!! Now the rest of us are starting to get it. I don't think we have enough bathrooms to accommodate that!!!!
June 1, 2013
Sewing Away!
I have been busy as a bee! Sewing, sewing and more sewing!! :)
Here is what I have.
This little outfit will be going in the bag I made this week along with the little lamb. It's not much but it's something!!
I just finished this bag a few minutes ago. I plan on putting a pair of shorts or PJ pants and a stuffed ball in it. :)
I was watching the news last. I can't believe all the tornadoes that were popping up. Is it just me, or does it seem like there are more than normal this year???
So thankful to be living near the mountains. I know that doesn't make us immune from the tornadoes but I feel a bit better. I can remember living in Middle Tennessee and being scared to death by the tornado warnings that seemed to happen way too often. We had no cellar or basement and I was always making the kids get in the closet.
I think we can be sure of being safe from hurricanes this year, too. No more flooding!!
Just counting my blessings today.
On a lighter note.... Guess what we have here????
An ICE CREAM LADY!!! WOOO HOOOO!!! That is something that we missed out on while living in the country! ;) We've only managed to catch her once. The first few times she drove through too quickly. Then the kids decided that we ought to wait outside for 30 minutes before the usual time, just in case! It worked! But we haven't seen it since. Was it something we said?? LOL Maybe she will show up today. Fingers crossed!
June 25, 2012
Drawstring Backpack Tutorial AKA The D Bag
D asked me to make her a drawstring backpack. She hardly ever asks me to make her ANYTHING so I jumped right on it. LOL
You will need -
1/2 yard of main fabric
1/2 yard of contrast
ribbon, rick rack, something for the drawstring ;)
Step 1 - Measure how long you will need your straps to be. Fold fabric over to where you have 4" below the fold. Cut 2.
Step 2 - While still folded in half with right sides together, press, pin and sew. Do the same to other strap.
Step 3 - Press flat with seam in the middle. Fold in half again, press and pin. Do the same to the other strap.
Step 4 - Sew 2 straight lines down the straps, one on each side. Do the same to the other strap.
Step 5 - Pin your straps to the outside of the main bag fabric.
Step 6 - Sew the end of the strap to the bag using a finishing stitch. Do that to all 4 ends.
Step 7 - Fold the strap down and sew a square with an X to reinforce it. Do that to all 4 ends.
Step 8 - Pin and sew the 2 sides of your bag.
Step 9 - Cut a piece of contrast 4" wide by the width of both sides of your bag.
Step 10 - Fold in half and press.
Step 11 - Fold up 1/4" of one side and press. Do that to the other side.
Step 12 - Fold in ends and press.
Step 13 - Open the casing you just made and pin to the top of your bag.
Step 14- Sew the casing to the top of your bag, leaving the ends open.
Step 15 - Grab your drawstring, if uncut DO NOT CUT! Pin one end and insert into casing.
Step 16 - Pull out a good bit of the drawstring. Cut and sew the ends together. I used a tight zig zag stitch.
Step 17 - Knot.
You're DONE!!!!
Let me know if you found this easy to follow!! And if you make one LET ME KNOW!! :)
Subscribe to:
Posts (Atom)


