
So here we go!
Supplies!

If you are doing a young child's size you will probably need less than a 1/2 yard of eyelet (or whatever) and less than a 1/2 yard of lining. C1 is a 5 in waist and chest but an 8 in length if that helps you any.
You will need a tank that fits your child to use as a template. Brown paper or wrapping paper (or whatever) to cut as a pattern.
And your basic sewing stuff. ;)
Step 1- place your child's tank on the paper and trace around it leaving room for seam allowance.

Step 2- Cut out your pattern

Step 3- Pin your newly made pattern to your lining material on the fold.

Step 4- Cut 2

Step 5- Pin your pattern to your eyelet on the fold.

Remove cat from eyelet

Step 6- Cut 2

Step 7- Pin right sides together one eyelet and one lining

Step 8- Start at one end and sew continuously around to the other end, leaving the bottom open
Step 9- Do the other eyelet and lining.
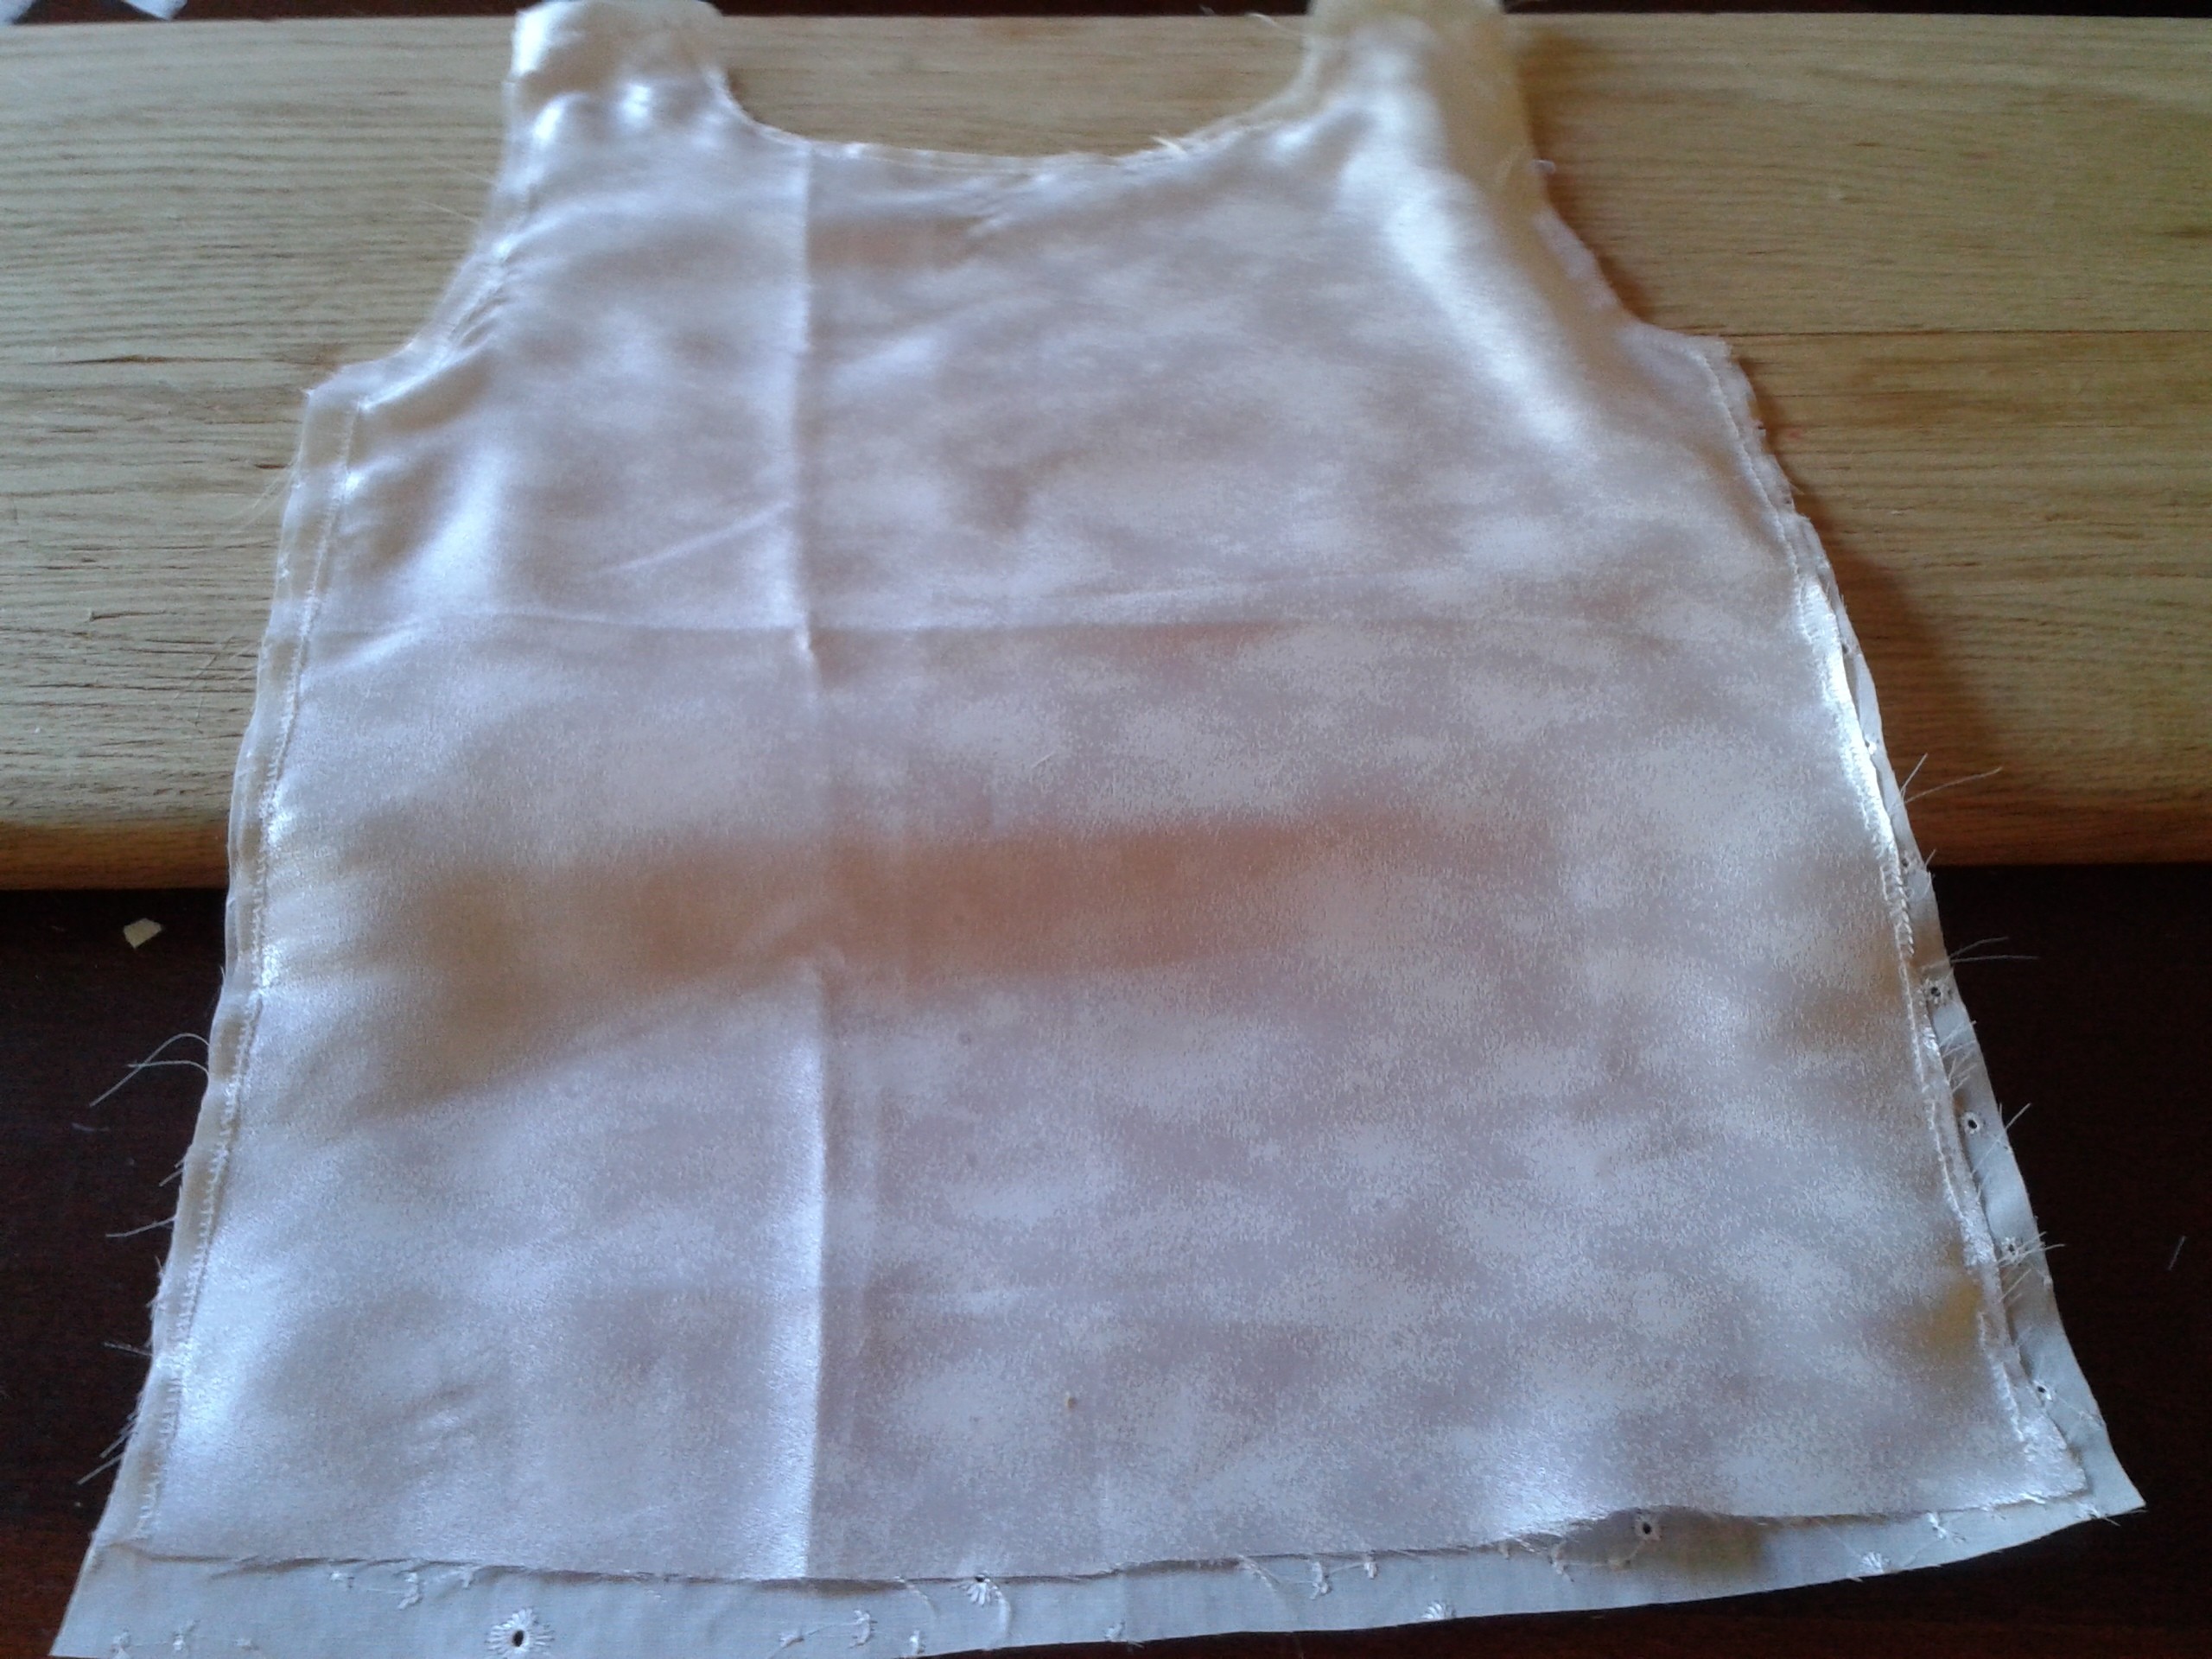
Step 10- Turn right side out and press and trim seams (if needed)

Step 11- Pin front to back with right sides together

Step 12- Sew top of straps together
Step 13 - Sew sides together

Step 14- Pin and hem the bottom

Step 15- Turn right side out and press seams

Congratulations! You just made the eyelet tank! So simple and cool for summer! And it goes with ANYTHING!
I'll be sure to take pics of c1 in her tank and May Flowers skirt tomorrow morning! :)
In other news... LOL I haven't been able to sew a stitch on the Retro Butterick '56. I've been WAY too busy today. BUT I did hit another fabric sale at Hancock's!! I got some awesome deals!!!
Butch and Sundance are warming up to us! Here is Butch headbutting a carrot....

And here is c2 playing with them while j2 and d walk them!

Hope you all have a great evening! See after church tomorrow! :)

Cute top.
ReplyDeleteThank you, LaVonne!!!! :)
ReplyDeleteI love eyelet! So pretty and summery.
ReplyDeleteThanks! :)
ReplyDeleteThanks!!! I will check out your blog and follow back! :)
ReplyDelete[...] the pic of c2 in the eyelet tank and the May Flowers [...]
ReplyDeleteI love the tank, so pretty! LOL @ the cat... mine does the same thing (he's orange, too... maybe that's it).
ReplyDeleteThank you!!!
ReplyDeleteLOL Maybe....Pammy is only interested it the fabric after becomes clothes... LOL
The tutorial looks so easy and I love the fact that you don't have to worry about the arms and collar area since you did the lining. What i want to know is how does it work since eyelet isn't stretchy?
ReplyDeleteThanks! :)
ReplyDeleteYou just have to make sure you cut it big enough to fit over the head. ;) I admit that I was a little worried about that AFTER the fact. LOL But when I had c1 try it on, it fit perfectly. If you're worried about that you can always cut a notch in the back for a button and piece of elastic. That should give it enough give to go over the head.
Very cute top!! I love eyelet fabric. Stopping by from Sumo's Sweet Stuff linky party. Here is what I shared this week: http://craftybrooklynarmywife.blogspot.ca/2012/06/kids-roll-up-nap-blanket.html
ReplyDeleteThank you!!!
ReplyDeleteOh!! I will go check it out! :)
very pretty love tanks
ReplyDeleteThank you! :)
ReplyDeleteMy grandma {who made all the clothes for a family of 6 kids} used newspaper to made her patterns. Amazing making the pattern, then making the outfit! Again thanks for linking up to Homa Style.
ReplyDeleteJeanette
http://homastyle.com
Great detailed tutorial and I love the "remove cat from eyelet" step ;) thanks for sharing this at the {what's shakin' link party} this week!!
ReplyDeleteThank you so much!!!
ReplyDeleteIt seems I have to add that step to every tutorial I do.. LOL ;)
Great tutorial and so nice to "meet" you! thanks so much for sharing on craft schooling Sunday! When I do start sewing it will be thanks to sewers like you who've pushed me over the edge!
ReplyDeleteThank you so much!! And thank you for hostessing a great linky party! :)
ReplyDeleteWhat a nice, straightforward project. Thank you for sharing it.
ReplyDeleteThank you!! :)
ReplyDeleteWow!! So beautiful! I LOVE eyelet and you're right: itgoeswith everything.
ReplyDeleteThanks so much for linking up at I Gotta Create! <3 Christina
Thank you so much!! :)
ReplyDeleteI love it! Perfect for summer :-) Our cats get on all of my sewing and crafting projects too; they just like to be where the action is! Thanks so much for linking this up to The Fun In Functional!
ReplyDeleteThank you!!
ReplyDeleteYeah, they like to be right in the middle of it! LOL
Thanks! Sorry it took me so long to reply. Your comment went to spam! :/
ReplyDeleteThat is stinkin' cute! I love those eyelets!!
ReplyDeleteYour tutorial is great and I think even I, a non-sewer, could make this! Thanks for linking up this week!
Stacey of Embracing Change
YAY!!! THANK YOU!!!! If you give if a try let me know!! :)
ReplyDeleteI have to include the second part of step 5 in all my projects too.
ReplyDeleteI like the second part of Step 5!!!!!
ReplyDeleteLOL!! Glad I'm not alone!!! ;)
ReplyDeleteLOL!! Thanks!!!! It seems to be a major part of ALLLLL my sewing! ;)
ReplyDelete[...] Eyelet Tank – me [...]
ReplyDeletePretty, I love it :-)
ReplyDeleteThank you!!!! :D
ReplyDelete[…] 2 - Eyelet Tank – June 2, 2012 – 4,535 views […]
ReplyDeleteFound your blog via a link on All Free Sewing dot com.
ReplyDeleteThank you for the great tutorial... such a soft and fuzzy pattern weight you have. :)
I will use this tutorial to create a pattern for my own tank top.
All the best to you and yours,
Christina in Cleveland.
Thank you much, Christina!! I hope you enjoy it!!! :)
ReplyDeleteI like this would you make an adult tank for mom. :)
ReplyDeleteThanks!! I might just do that one day.
DeleteDon't the shoulder seams show?
ReplyDeleteNope. Not at all. :D
DeleteYou can click on the picture to make it bigger and check it out.