This was so much easier than I thought it was going to be. LOL I think I was a little intimidated by the tulle. ;)

This is what I used-
Part of 1 white sheet
3yds of tulle
1" elastic
Step 1- Measure your waist and add about 5"
Step 2- Cut (if you are using a sheet, make sure to cut it so you won't have to hem;)) I cut my length at about 20" I have VERY short legs and I wanted the petticoat to hit just below the knee.
Step 3- Fold your tulle over 4 times so that you end up with a long piece about 8" in width
Step 4- Run a gathering stitch across the top of the tulle so that there are no opening except the sides

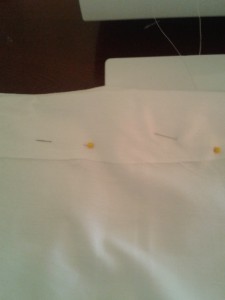
Step 5- Pin tulle to the right side of the petticoat adjusting gathers as needed. Zig-zag tulle to the fabric
Once again, remove the cat... I told you she does this EVERY time!!!!!!

Step 6- With right sides together stitch up the side seam

Step 7- With right sides still together fold over about 2 " from the top for your elastic casing.

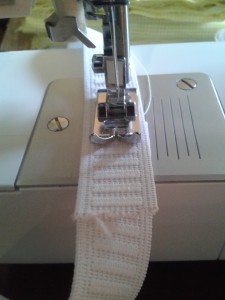
Step 8- Sew elastic casing making sure to leave opening for the elastic.
Step 10- Measure elastic to your waist measurement (most people say to add a bit for seam allowance but I find that it makes the elastic too loose)
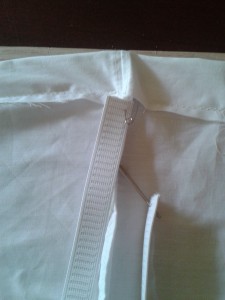
Step 11- Pin a large safety pin to both ends of the elastic and thread through the elastic casing making sure to hold BOTH safety pins securely.
Step 12 - Sew the ends of the elastic together

Step 13- Sew the opening in the elastic casing closed

Step 14- Turn right side out and fluff the tulle!

All done!! :) I can't wait to see how this looks under the Retro Butterick '56!! And the New Look 6824 that I made into a blouse and skirt! :) I might have to take some pics tomorrow to show you!
I already have the pattern cut for my next project! I'll be making this for c1-
McCall's M6544

I'll be making the view that the girl is wearing only in yellow gingham with eyelet ruffles!!! I can't wait!! :)
Then the NEXT project will be McCall's M5135

Can you see the eyelet making a come back for that one, too?? LOL
Oh!! And somewhere in there I want to make purses for d and me and PJs for c2!!!! LOL Sooooo much to do, so little time!!! ;)
Hope you enjoyed the tutorial!!


I love it:) I have no skirts to wear it under... yet:)
ReplyDeleteROFLOL!! I like that YET! ;) c1 is now wanting one! LOL
ReplyDeleteGREAT tutorial!! The petticoat looks GREAT!!
ReplyDeleteThanks so much for sharing this at The DIY Dreamer... From Dream To Reality!!
Thank you!!! :) I can't wait to try it out!
ReplyDeleteThis is a really nice petticoat....Thank you for including the tutorial.
ReplyDeleteThank you! I had a lot of fun making it. :)
ReplyDeleteThis is such a great idea,thanks for sharing!
ReplyDeletewww.blissfulsewing.blogspot.com
Thank you!! :)
ReplyDeleteA tip that I use that you might try for your step 11
ReplyDeleteStep 11- Pin a large safety pin to both ends of the elastic and thread through the elastic casing making sure to hold BOTH safety pins securely.
I use a large safety pin to secure one end of the the elastic to the side of the casing opening before threading the other end through the casing. That way you never lose your elastic or pull it too far through.
Oh!! GREAT tip, LaVonne!!! I am definitely going to do that from now on. I don't know how many times it has slipped out of my hands no matter how securely I try to hold it! LOL Especially when the kids are running around the room! ;)
ReplyDeleteTHANK YOU!!
I love the little girl's outfit that you will start. Perhaps DH can show off his cobbler skills and make C1 matching sandals as well!
ReplyDeleteROFLOL!! That would be too cute but I'm not holding my breath! ;)
ReplyDeleteMy parents' cat does exactly the same thing!
ReplyDeleteLOL!!! I swear she thinks I put the fabric out just for her!! LOL Rotten cat. The other one waits until I hang an outfit up and then she attacks it. SIGH....
ReplyDeleteStacy, you lost me on step 1...measure your waist and add 5 inches...eak! LOL! You presented this so well I think I could even make it. Thank you as well for linking this to Homa Style' Simple Wednesday Link Party.
ReplyDeleteLOL!!! Yeah.... It isn't pretty when I add the 5" to mine.... ;)
ReplyDeleteTHANK YOU!!!!
haha! My dog does the same thing. So funny!
ReplyDeleteIt's crazy!!! LOL Even if I leave a tiny scrap on the table she will try to sleep on it!! LOL
ReplyDeleteCute! And those cats are notorious for lazing around on whatever you happen to need at the moment: your sewing, the newspaper, magazine. Lol! They make it fun. :)
ReplyDeleteOh! And... Thanks so much for linking up at I Gotta Create! <3 Christina
ReplyDeleteThanks!!
ReplyDeleteAnd you are VERY right!! They are always in the middle of everything!! LOL
No, thank YOU!!!! ;)
ReplyDeleteHaha, love that the cat is on your project again! Thanks so much for the tutorial! I have some skirts that could use a little poofing, so I've got to try this! I'm really glad you linked this up to The Fun In Functional!
ReplyDeleteTHANK YOU!!
ReplyDeleteROFLOL!! Yeah, they feature in every single one of my tutorials... Especially the pajamas.... LOL
This is so cute!! Looks like you get a lot of help from your sweet cat. :) We are so happy to have you join us for our "Strut Your Stuff Saturday". Please come back soon!! -The Sisters
ReplyDeleteThank you!!!
ReplyDeleteYep... Lots and lots of help... LOL
Very nice! And the next pattern you have looks awesome - so cute!
ReplyDeleteThanks for linking this week!
Stacey of Embracing Change
Thank you! :)
ReplyDeleteGreat tutorial!! Thank you for sharing at Sharing Saturday!!
ReplyDeleteThank you SO much!!! I LOVE being a part of it! :)
ReplyDelete